Know how directly from the Microsoft 365 mail merge experts
How To Export Outlook Emails To DOCX
Exporting Outlook emails to DOCX can be tricky, especially if you’re doing it for the first time.
But at the same time, it is increasingly becoming popular among marketers, analysts, and digital strategists. That’s because different companies need the data in different formats for ease, accessibility, presentation, and organization purposes.
This is where Outlook 365 export emails to file as DOCX can help you save the day.
Intriguingly, the DOCX format, known for its versatility and compatibility with Microsoft Word, holds immense potential.
In fact, over 1 Million companies worldwide used Microsoft Office in 2023, with Word being one of its most favored applications.
Now, imagine harnessing this power to convert your Outlook emails into neatly formatted DOCX files. The possibilities become limitless.
So, whether you’re looking to archive important emails, create detailed reports, or simply need a more accessible way to share email content, this guide will be your key to unlocking Outlook’s potential.
By the end, you’ll know the steps to export Outlook emails to DOCX and discover ways to expedite the process, making you more efficient and productive in digital communication.
So, let’s jump in!
4 Steps on How to Export Outlook to Docx
Exporting your Outlook emails to DOCX format may seem daunting, but rest assured, it’s a straightforward process once you break it down into manageable steps.
Here are the four essential steps that will have you converting your email content into Word documents in no time:
Step 1: Launch Microsoft Outlook
To get started, ensure an updated Microsoft Outlook is up and running on your system. Once Outlook runs, you’re ready to move on to the next step.
Step 2: Select the Email to Export
Next, you must decide which email you want to export. This can be a single email or a group of emails. For now, let’s just go through the process of exporting one Outlook email to Docx.
Step 3: Save Emails as Text
Before converting your selected emails into DOCX format, they must be saved as plain text files.
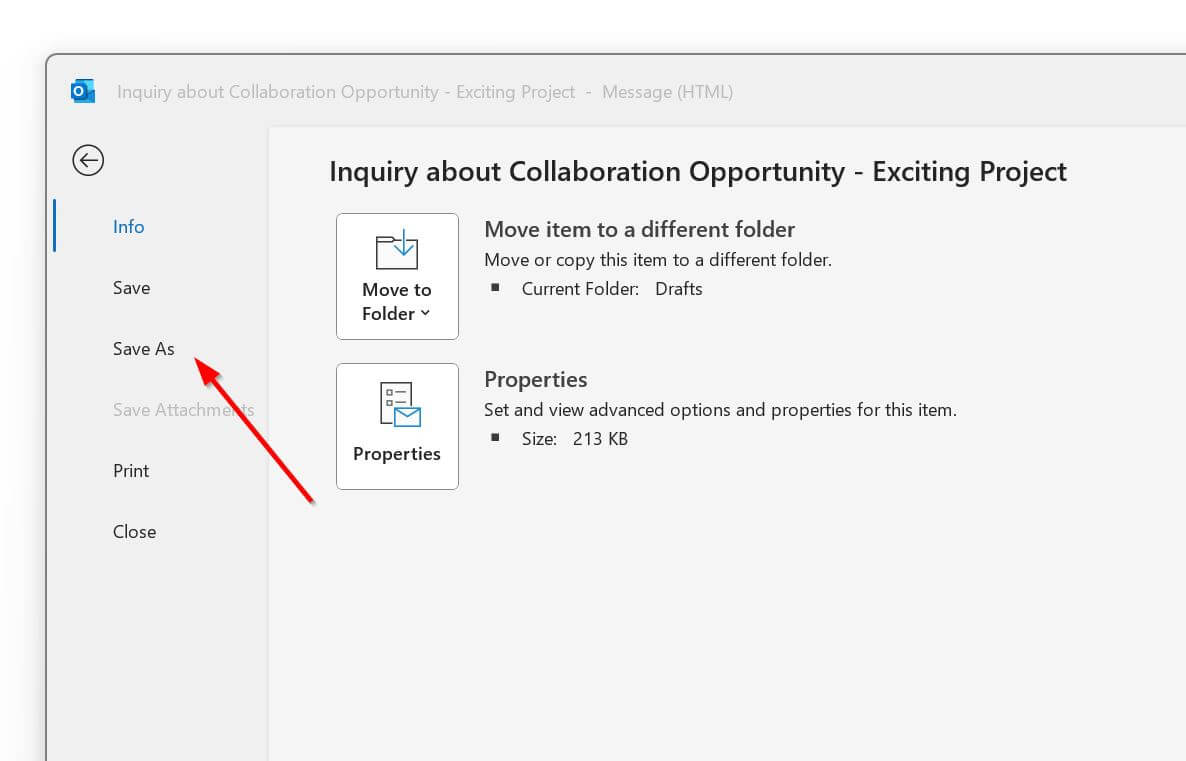
- To do this, go to the ‘File’ menu at the top-left corner of your Outlook window.
- From there, select ‘Save As.’
- A dialog box will appear, prompting you to choose the location where you want to save your emails. You can select a specific folder for this purpose.
Once you’ve designated the save location, choose ‘Text Only’ as the file type. This action will save your selected emails in .txt format. Don’t worry if they appear as plain text at this stage; we’ll add style and formatting in the next step.
Step 4: Convert Text Files to DOCX
With your emails now saved as plain text files, it’s time to transform them into the familiar and versatile DOCX format.
For this step, you can use Microsoft Word, ideal for handling Word document files. Open the saved text files using Microsoft Word and proceed to format the content according to your preferences. You can add styling, headers, footers, images, and other elements.
Once your emails are styled to your satisfaction, save the document in DOCX format. To do this, go to the ‘File’ menu in Microsoft Word, select ‘Save As,’ and choose ‘Word Document’ (.docx) as the file format.
How to Make Multiple Emails Export Outlook to Word
While exporting a single email to Word is straightforward, the task becomes more efficient and time-saving when exporting multiple emails simultaneously.
Here are some strategies to help you manage this more complex scenario:
Step 1: Create a New Folder
If you’re dealing with a batch of emails, the first step to make multiple email export easier is to create a new folder in your Outlook account. This folder will be a temporary container for the emails you want to export to Word.
-
In your Outlook, navigate to the ‘Home’ tab, then click ‘New Folder.’
-
Give the folder a relevant name to help you identify its contents.
-
Now, move the emails you wish to export to this newly created folder by converting them to ‘text only’ files in the same way as Step 3 in the section above:
Export email to text:
- Open the specific email you wish to export.
- Go to the ‘File’ menu.
- Choose ‘Save As.’
Save as plain text
- A dialogue box will emerge, providing you with several options.
- In the ‘Save As Type’ field, select ‘Text Only.’
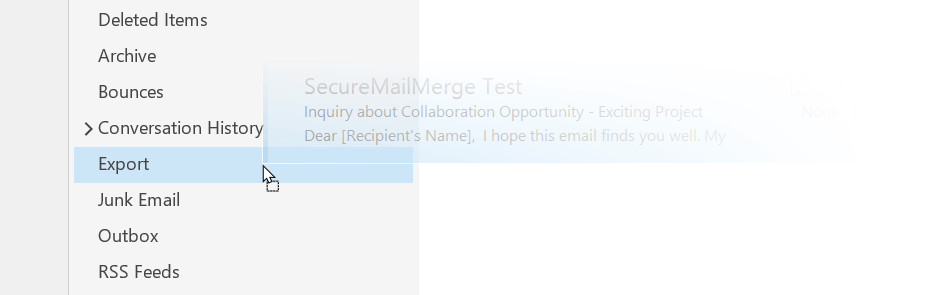
- Select the folder you just made.
- Then, click on ‘Save.’
Once your emails are organized in this folder, you can export them to Word. This method simplifies the selection process, as you can simultaneously export all the emails in the folder.
To convert all email text files in the folder to Docx at once:
- Open your folder and select all emails.
- Right click on your selection.
- From the context menu select ‘Open with.’
- Select Word from the drop-down options menu. The whole list of emails in that folder will convert to a Word file which you can save on your device by clicking on ‘Save As.‘
Bonus: Use Outlook Rules to Automate Export
Outlook offers a powerful feature called ‘Rules,’ which allows you to automate actions on incoming and outgoing emails. You can leverage this functionality to streamline selecting and exporting multiple emails.
Tip: Learn how to set up Rules and watch a tutorial by Microsoft.
- Open Outlook and go to the ‘File’ tab.
- Select ‘Manage Rules & Alerts.’
- Click on ‘New Rule’ to create a custom rule.
- Follow the prompts to set conditions that match the emails you want to export. For example, specify the sender, subject, or content criteria.
- In the next step, choose ‘Move a copy to the specified folder’ as the action.
- Select the folder you’ve created in Method 1 as the destination.
- Complete the rule creation process and save it.
With this rule in place, Outlook will automatically move the specified emails to your designated folder in text form. You can then proceed to export these emails to Word in a more organized and automated fashion.
How to Export Emails from Excel to Outlook – Automate Sending and Storing
There are times when you might find yourself in a situation where you have important email content stored in an Excel spreadsheet that needs to be incorporated into your Outlook account before being exported to Word in DOCX format.
Or you could use Excel as your primary method of managing emails and prefer to have the response chains stored in Docx.
If you wish to have it automated, here’s a simple guide to help you bridge the gap between Excel, Word and Outlook with SecureMailMerge:
1. Install the SecureMailMerge Plugin
Begin by installing the SecureMailMerge plugin for Outlook. This plugin is a valuable addition that enhances your email capabilities.
2. Launch Outlook and Create a New Email
After installing the plugin, launch Microsoft Outlook and create a new email as you typically would.
3. Access the SecureMailMerge Plugin
Look for the SecureMailMerge plugin in the Outlook ribbon. Click on it to initiate the setup process.
4. Add Your Email List
Import your email list from Excel or any format with personalized fields and content. SecureMailMerge will intelligently configure this data for you, simplifying the process.
5. Customize Email Content
Personalize your email content by using dynamic fields. Add personalized information within double curly braces {{ }} and reference cell names or commands to make your emails unique.
6. Advanced Features
Take advantage of additional features like setting up Delayed Emails for specific dates, adding email signatures, and scheduling automated appointments. SecureMailMerge seamlessly integrates these functionalities within Outlook.
Once the automated email process is set up, SecureMailMerge efficiently manages the sending of emails based on your specified schedule and recipient list.
Following that, you can select and specify your multiple email chains and store them as Text in a folder after converting to Docx.
Final Word
Exporting Outlook emails to DOCX format is a valuable skill for anyone who depends on email communication. This capability makes archiving and sharing emails more convenient and opens doors for further customization and organization.
Following the steps outlined in this guide, you can effortlessly transform your Outlook emails into versatile DOCX documents that are ready for many applications.
However, to supercharge your email capabilities and enhance your experience with Microsoft Outlook, you’ll need SecureMailMerge. This feature-rich add-in takes your email game to the next level with its impressive offerings:
- Flexible Sending Options: Enjoy the freedom to send emails from various spreadsheet formats or directly from your address book, making personalization a breeze.
- No Size Limitations: Say goodbye to email size restrictions, allowing you to send messages and attachments of any size, meeting your business needs without constraints.
- Individualized Attachments: Attach custom files for each recipient effortlessly, streamlining your communication.
- Simple Mail Merge: Outlook’s sleek and contemporary interface ensures a streamlined and efficient mail merge experience.
Try out SecureMailMerge for free to elevate your productivity, improve your email deliverability, and enhance your email marketing efforts!
Enjoyed this article?
We have a whole library of useful articles for you to read
Show me the library of Outlook articles