Know how directly from the Microsoft 365 mail merge experts
How to Set a Signature in Outlook in 7 Simple Steps
The volume of emails sent daily is staggering, with nearly 347 billion emails being sent worldwide daily, encompassing both business and personal communication.

This exponential growth highlights the importance of making your emails stand out and leave a lasting impression. One effective way to achieve this is by utilizing a well-designed email signature.
However, if you’re an Outlook user, you might feel lost in setup and customize your signature.
And while you can find several guides making it seem too technical, we covered you with 7 simple steps to create, add and change signatures in Outlook.
In this step-by-step guide, we will walk you through setting up a signature in Outlook and how it can be enhanced to look more personalized and hassle-free for your email campaigns with a pro strategy.
So let’s get started!
The Importance of Email Signatures
Before diving into the technical steps, let’s briefly discuss why email signatures are crucial.
An email signature is a digital business card providing recipients with valuable information about you or your organization. It adds a personal touch, enhances professionalism, and reinforces your brand identity.
A well-designed signature can also include relevant contact details, social media links, and marketing messages, making it a powerful tool for effective communication.
With how email campaigns remain mainstream in the digital industry, whether you run a business account, a personal account as a solopreneur, or wish to automate email sign-offs for your team, you need to make them stand out with customization!
5 Benefits of Adding a Personalized Signature
The impression and information your Outlook signature can provide is only the tip of the iceberg. Several other benefits come with signing off your emails the right way, including increased conversion/ response rates!

1. Building Trust and Credibility
A signature adds a touch of professionalism to your emails, but why is that good?
To explain better, it’s helping you establish credibility and trust with recipients.
Trust is a valuable commodity in email communication, especially considering the prevalence of phishing scams and spam. However, when there is a foundation of trust with the person you are communicating with, you are more likely to be open and receptive.
This is why most business emails carry sign-offs with their real names/ brand names, designations, contact info, and other valuable content for the recipient. These are typically related to critical business matters.
2. Increased Revenue
Research conducted by Marq (Lucidpress) indicates that consistent branding can increase revenue by 33% across all communication channels. Including your company logo and colors creates a consistent brand image, reinforcing recognition and brand recall.
3. Better Response Rate
Your signature can display essential contact details such as your name, job title, phone number, and website, making it easy for recipients to reach out to you.
A survey conducted by HubSpot found that including contact information in email, signatures can lead to a 32% increase in email response rates. Now, with more revenue and response, you can add up the numbers to see why it’s crucial!
4. More Marketing Opportunities
Treating your email signature as more than just a means of sharing contact details can significantly enhance its value. By incorporating it into your already winning email marketing strategy, your email signature becomes an additional marketing channel.
This approach allows you to leverage the potential of your signature to promote your brand, share marketing messages, and engage with your audience in a targeted and impactful manner.
5. Ensuring Legal Compliance
Depending on your industry, certain legal requirements might mandate including specific information in your email signature, such as disclaimers or opt-out options.
Ensuring compliance with these regulations protects your business from potential legal issues and fines. For example, industries such as finance and healthcare often require disclaimers to comply with privacy and security regulations.
Pro tip
While manually setting up a signature works, using email automation tools is the most effective way to ensure your email sign-offs are added to all emails for marketing and compliance purposes
How to Set up Signature in Outlook – 7 Simple Steps
Now, let’s dive straight into the practical steps on how to set a signature in Outlook. First let’s look at how to do it in the modern versions of Outlook (New Outlook) and on the Web. Further down you will find the instructions for Classic Outlook.
New Outlook and Outlook on the Web
Step 1: Access Outlook Settings
For “New Outlook” on Desktop and for Outlook on the Web, click “Settings” at the top of the Outlook page and select “View all Outlook settings.”

Step 2: Navigate to Email Signature
In the settings menu, choose “Mail” and “Compose and reply.” This page will show all settings for an email signature.
Step 3: Enter Your Signature
Under “Email signature,” Select “New Signature,” type your desired signature, and use the available formatting options to customize its appearance.
You can also add an image of your signature here or copy-paste one designed in advance.
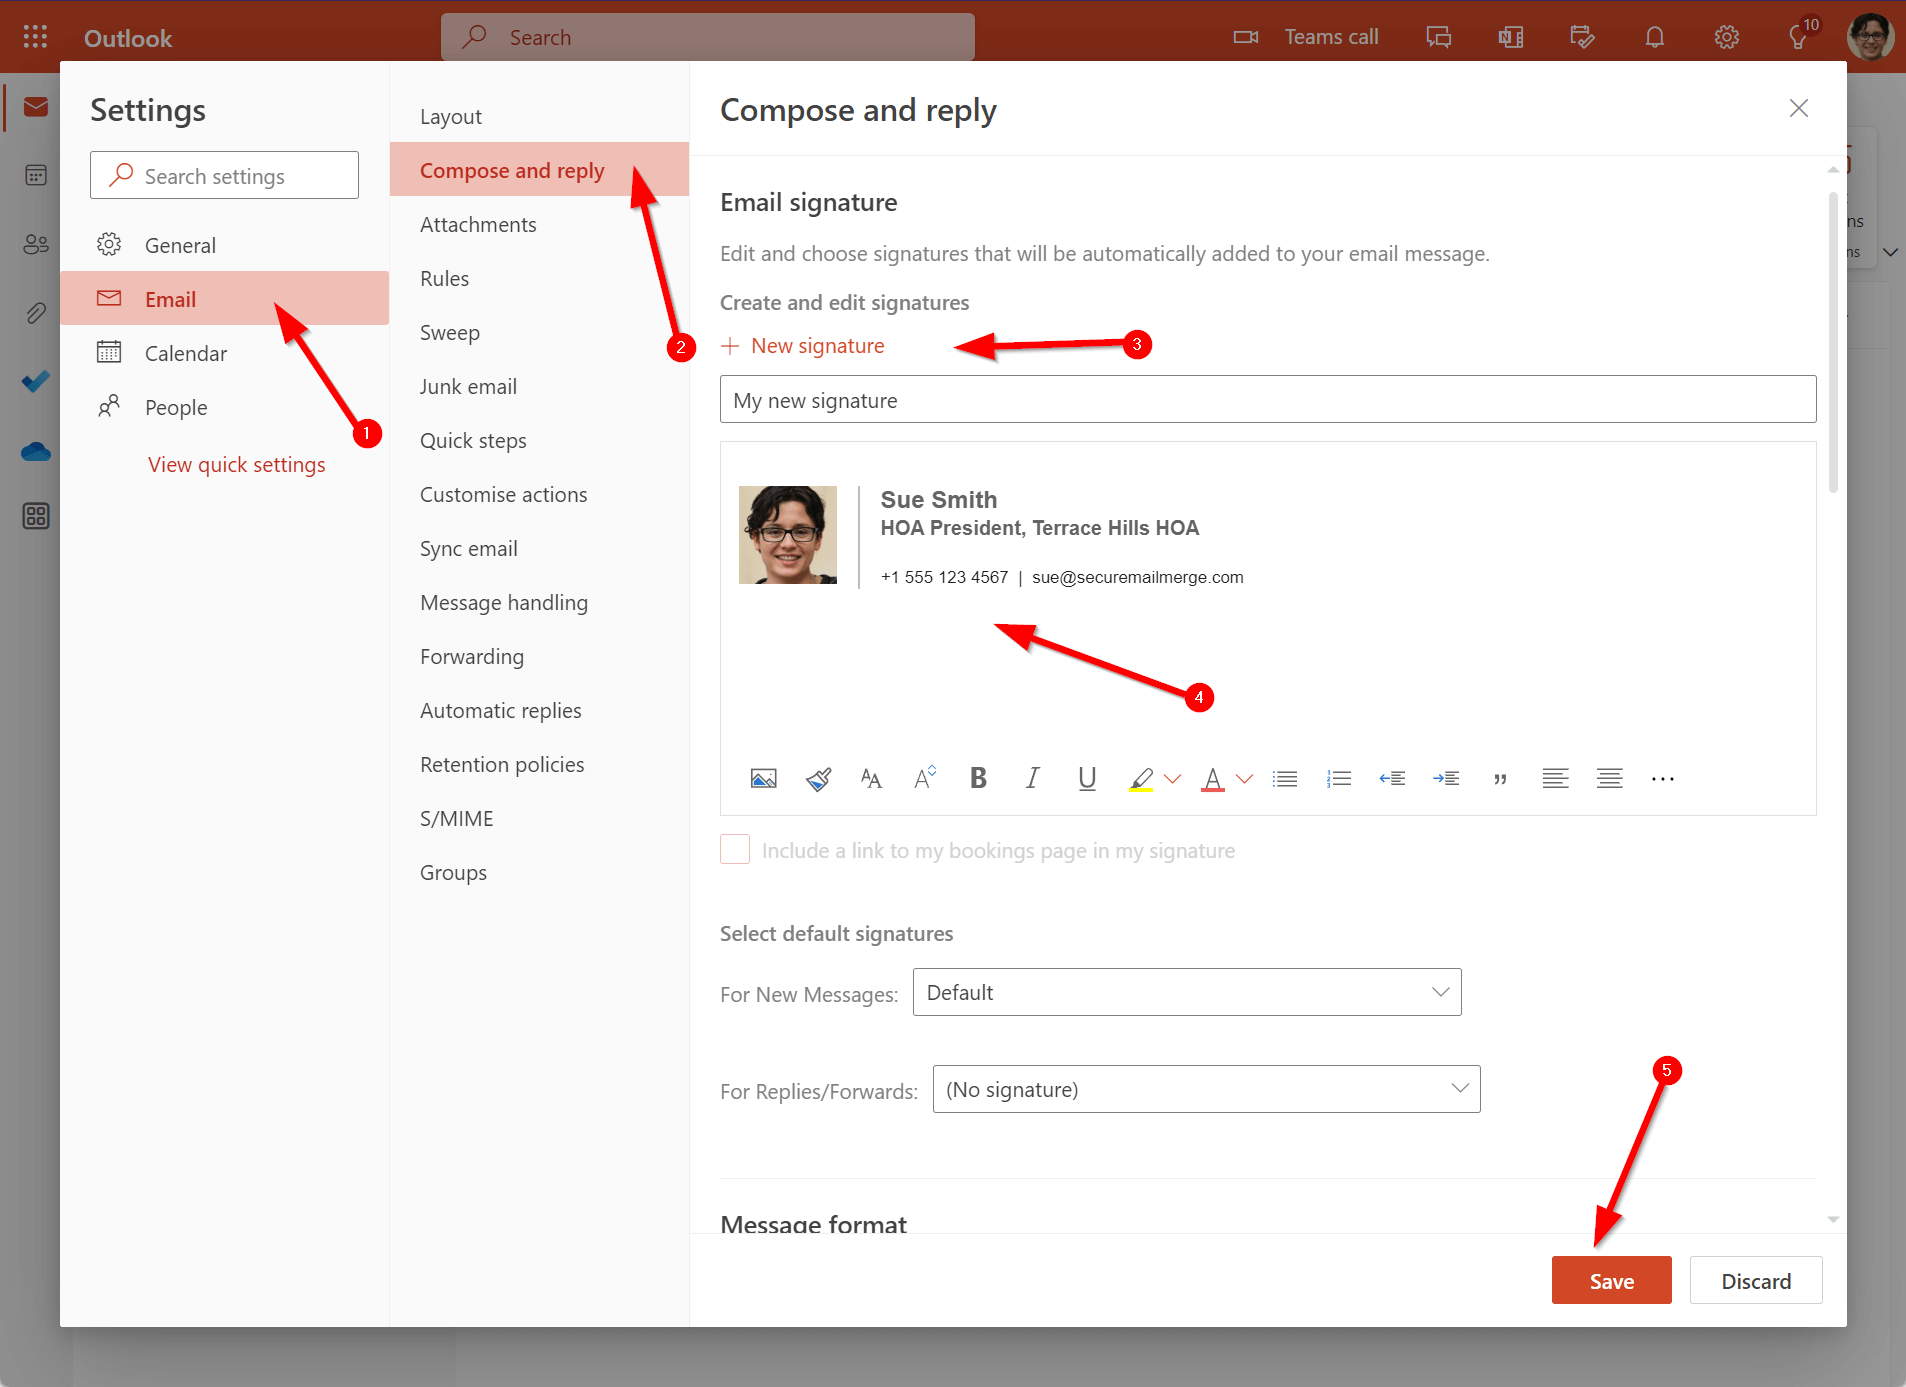
Remember to click Save before you continue.
Step 4: Automatically include signature in New Messages
If you want your signature to appear at the bottom of all new email messages, enable the “Automatically include my signature on new messages I compose” option.
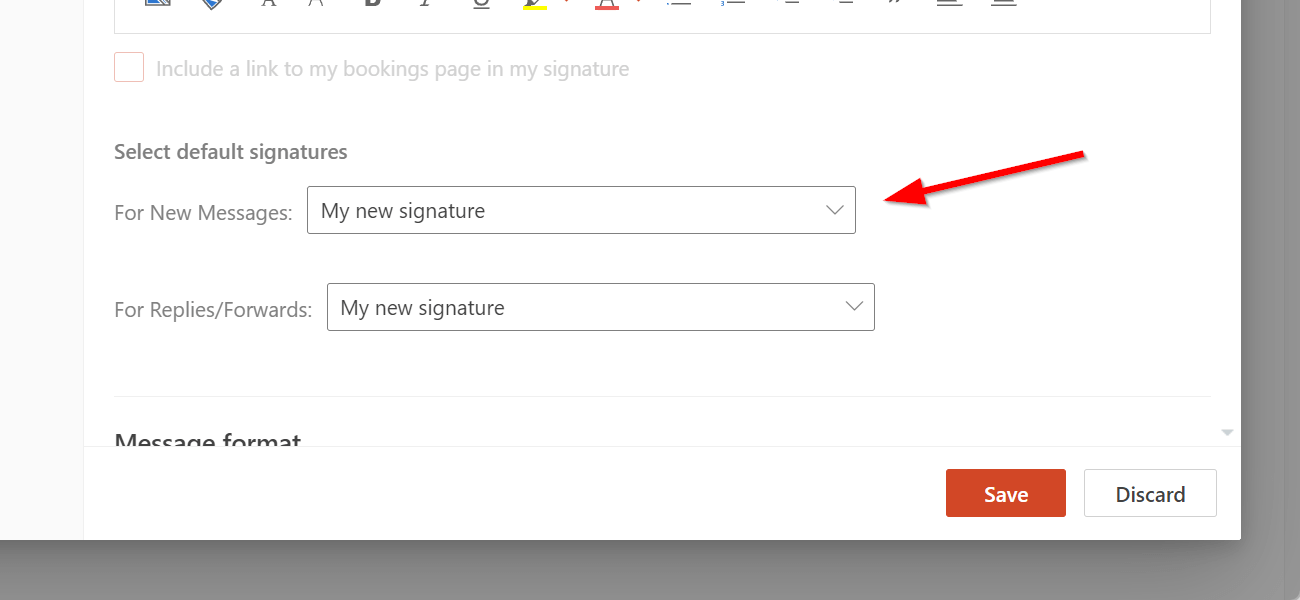
Step 5: Also add signature automatically in forwarded or replied Messages
If you want your signature to appear on forwarded or replied messages, enable the “Automatically include my signature on messages I forward or reply to” option.
Step 6: Manual Add to Specific Messages
If you use a personal email and prefer to add your signature manually for specific messages, leave the automatic inclusion options unchecked.
Then you can add the signature manually using the menu when composing new emails, see below.
Step 7: Save Your Changes
Once you’re done creating your email signature and selecting the desired options, click “Save” to save your settings.
Note: You can always revisit the “Compose and reply” settings page to modify the automatic inclusion of your signature, make edits to the format and design, or change the information.
Classic Outlook on the Desktop
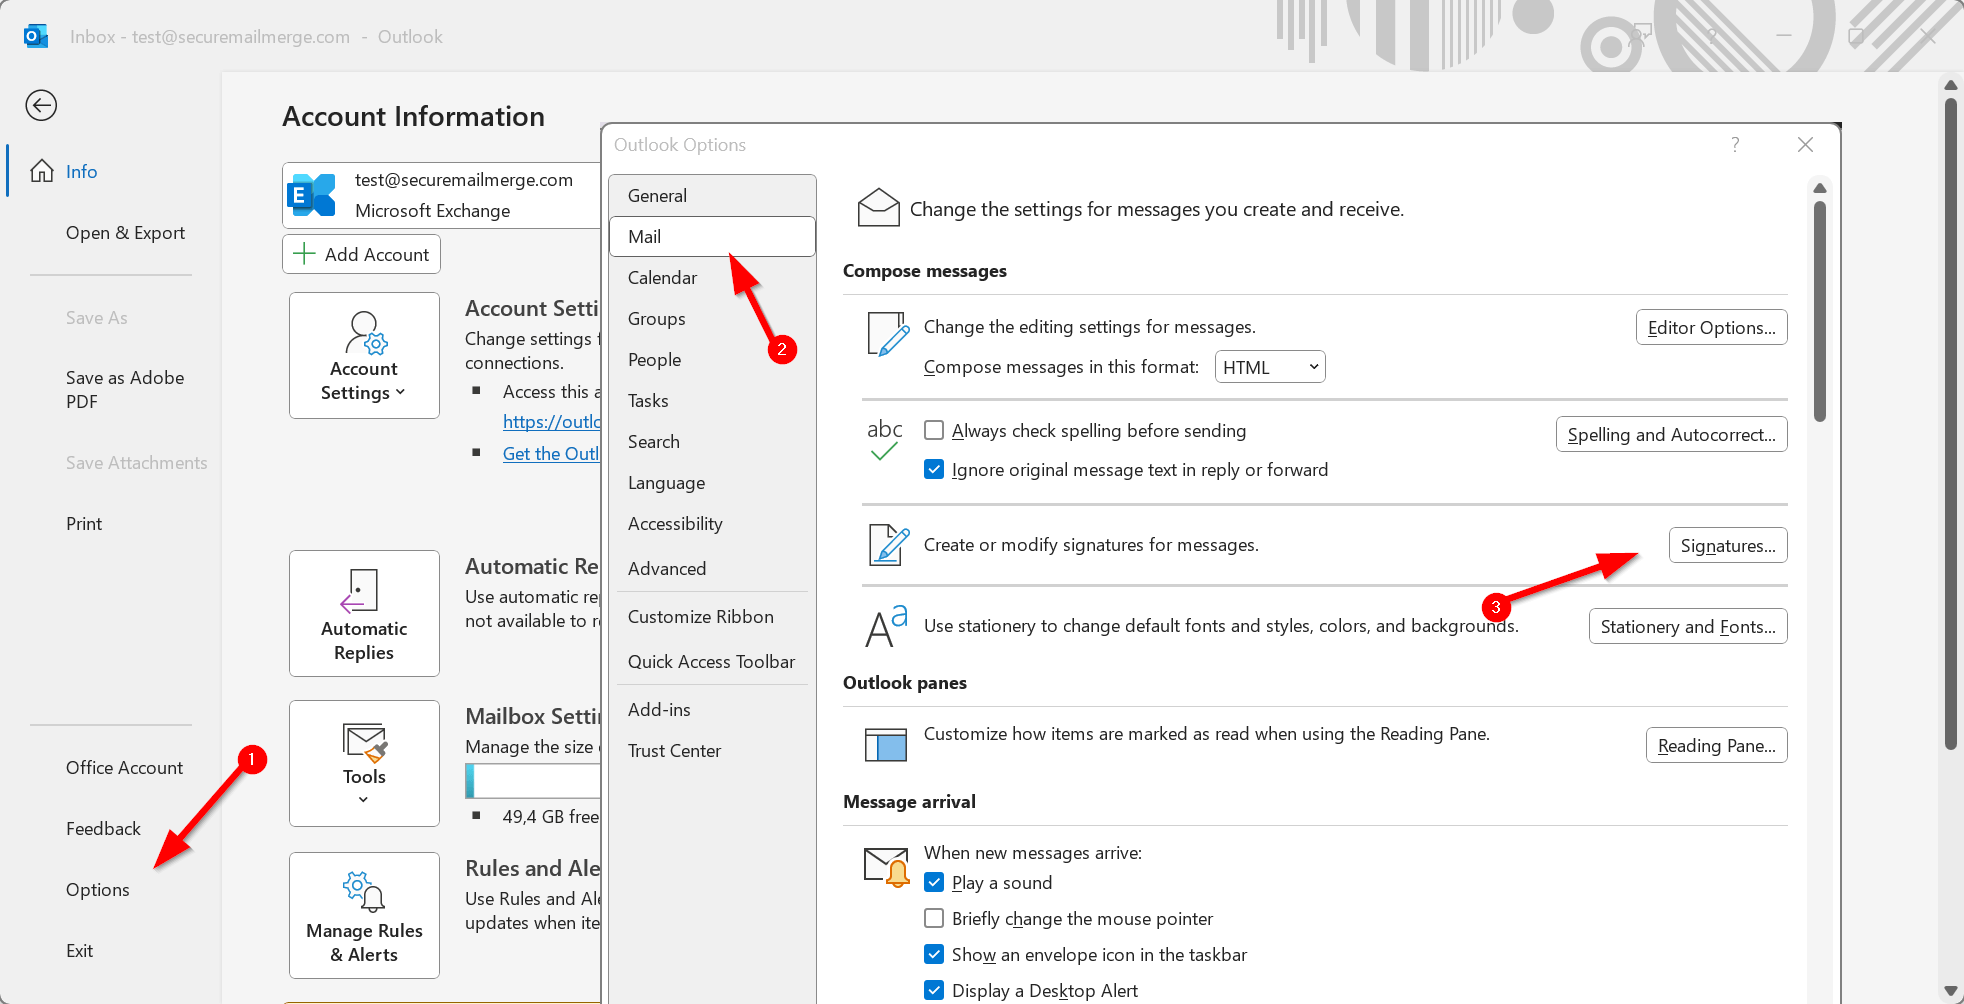
Step 1: Access Outlook Settings
For older versions of Outlook on the Desktop click on the File menu, then go to Options at the bottom.
Step 2: Navigate to Signatures
In the window that popups click Mail and right the Signatures button on the right.
Step 3: Enter Your Signature
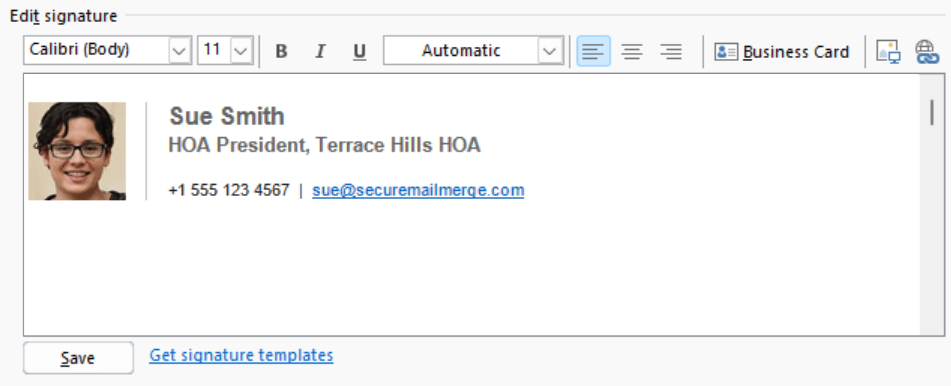
Under “Email signature,” Select “New,” type a name for your signature.
Then in the field below you can set your signature, use the available formatting options to customize its appearance and add images. If you like you can just copy paste a signature image from an image editing program or copy past one from a signature editor.
Step 4: Automatic Inclusion in New Messages
In the section beneath the signature editor titled “Choose default signature” you can select your new signature in the dropdown next to “New Message”. This will include it in all new messages.

Step 5: Automatic Inclusion in Forwarded or Replied Messages
You can also do the same for replies and forwarded messages if you wish in the second dropdown.
Step 6: Manual Add to Specific Messages
If you leave both dropdown set to “(none)” you can still manually add signatures from the menu when you write emails, see below.
Step 7: Save Your Changes
Once you’re done creating your email signature and selecting the desired options, click “Save” to save your settings.
Note: You can always revisit the “Compose and reply” settings page to modify the automatic inclusion of your signature, make edits to the format and design, or change the information.
How to Add Signature to a single Outlook Manually
Suppose you have already created a signature but left it out of all outgoing messages. In that case, you can add it manually when composing an email message by following these steps:
1. Open a New Message
Go to your mailbox and choose “New message” to compose your email.
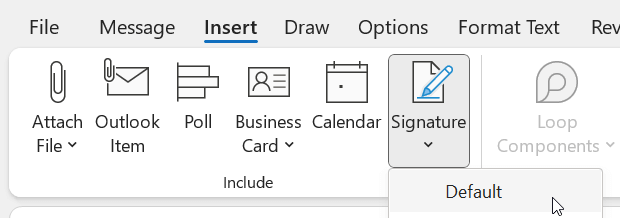

2. Insert Your Signature
Type your message and select “More actions” followed by “Insert signature” at the bottom of the compose pane. Your signature will be added to the email.
If you want a different version for your signature in a specific email, you can also add that manually after changing the format in “Compose and reply” settings.
3. Send Your Email
Once your email message is ready, review it and choose “Send” to send it with your signature included.
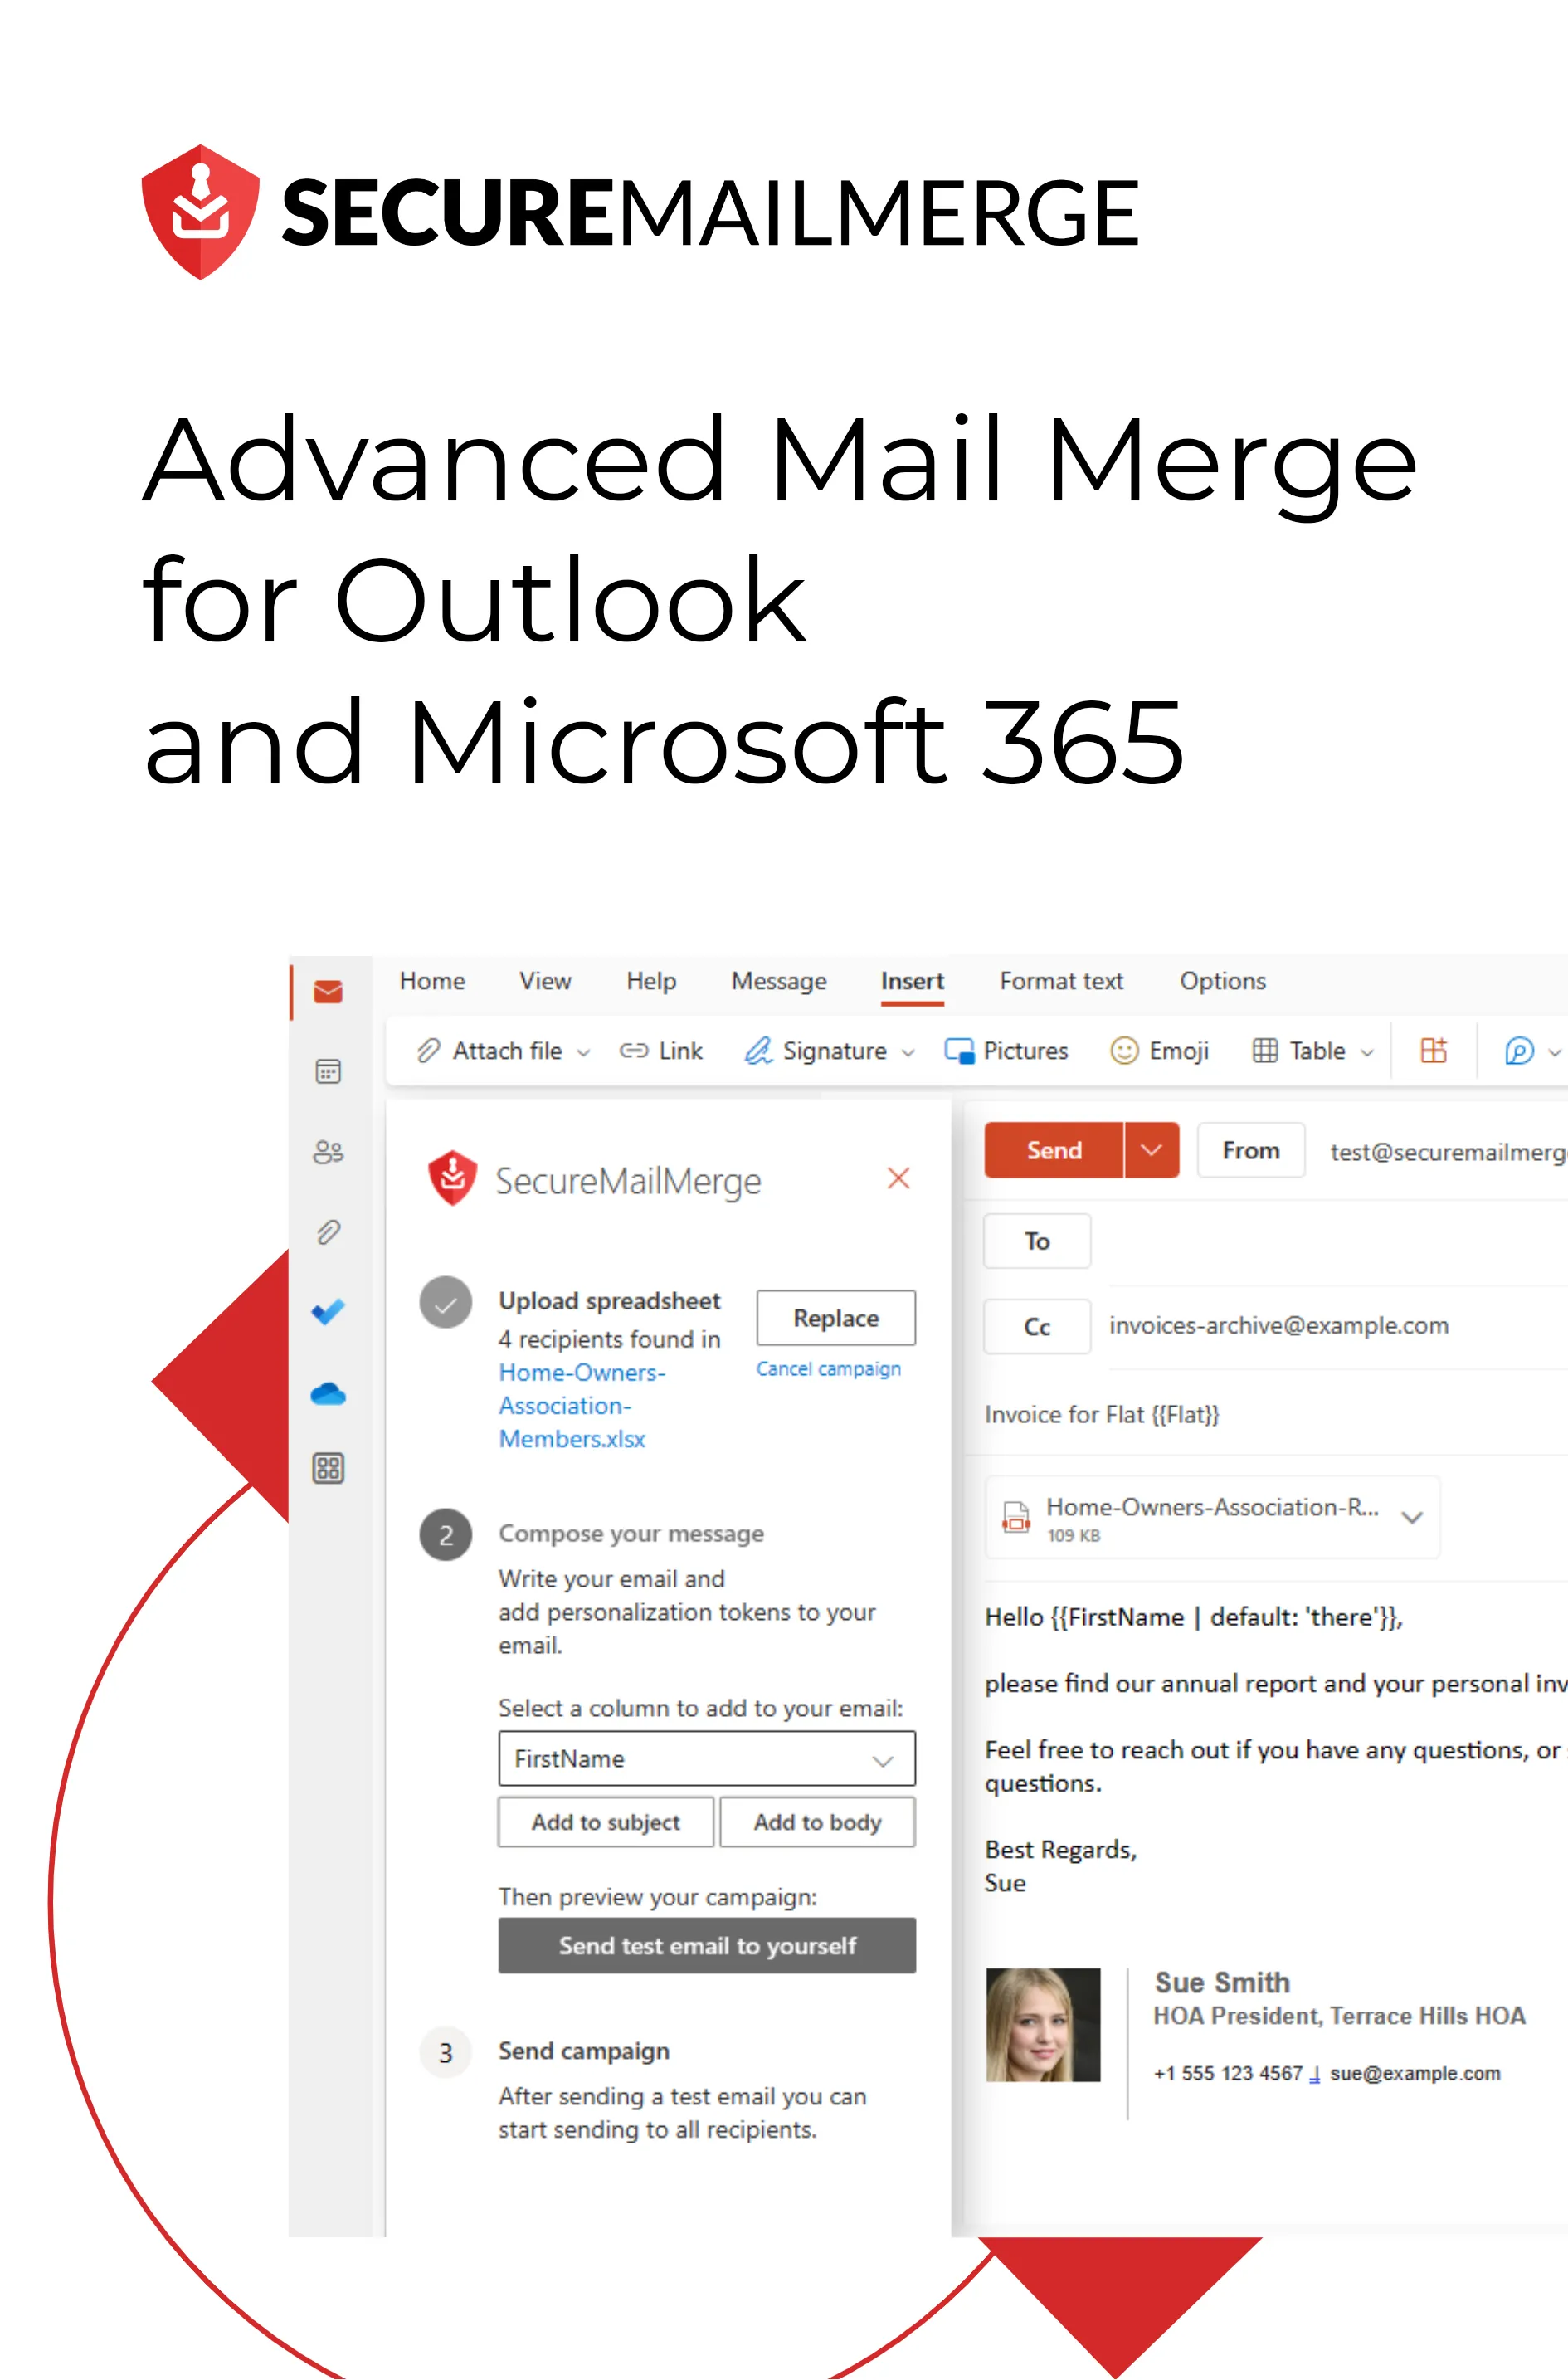
Secure Mail Merge – Enhancing and Automating your Email Campaigns in Outlook
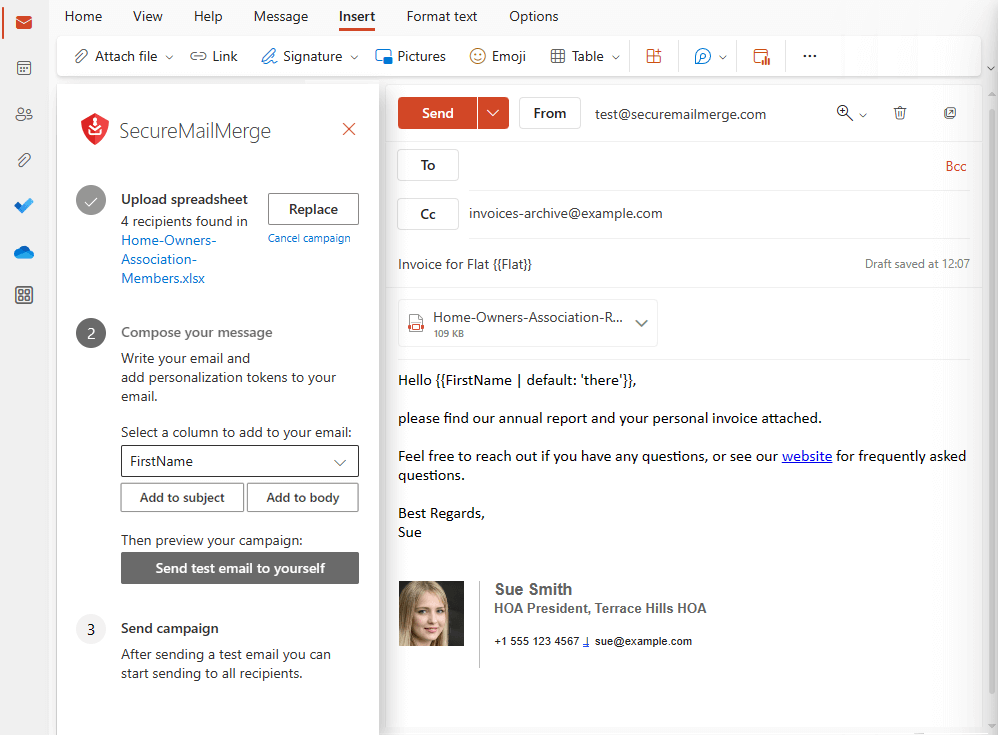
While Outlook provides basic signature functionality, you can elevate your email campaigns with the Secure Mail Merge plugin. This powerful tool integrates seamlessly with Outlook and offers several benefits other than unique automated signatures:
- Send personalized emails from your Microsoft 365 account, a spreadsheet, or your contacts.
- Send large files, long messages, videos, or multiple images without restrictions.
- Add personalized invoices, custom reports, or unique attachments per recipient.
- Send as many emails as your Microsoft 365 account supports—no limits on any plans.
- Make your emails feel personal by using cells from your spreadsheet and personalizing every email sent out in bulk!
- Add tables, images, and other formatting elements you’re familiar with from Outlook. Enhance the visual appeal of your emails.
- Boost engagement, save time, and maximize the potential of your Outlook emails.
- …and of course supports Outlook signatures out of the box
Installing SecureMailMerge is a breeze, regardless of your operating system — Windows, Mac, or Web. Follow these steps to find and install the Office Add-In Store (AppSource) plugin.
Download SecureMailMerge for Free and take your email campaigns to the next level!
Enjoyed this article?
We have a whole library of useful articles for you to read
Show me the library of Outlook articles