Know how directly from the Microsoft 365 mail merge experts
How to Send a Mail Merge Campaign Using an Email Alias in Microsoft 365
In this blog post, I’ll show you how to send a mail merge campaign using an email alias in Microsoft 365. This can be particularly useful when you want to send emails from an alternative email address, such as a support account, while still utilizing the same mailbox. If you prefer you can also watch the video on YouTube.
Preparing Your Spreadsheet and Outlook
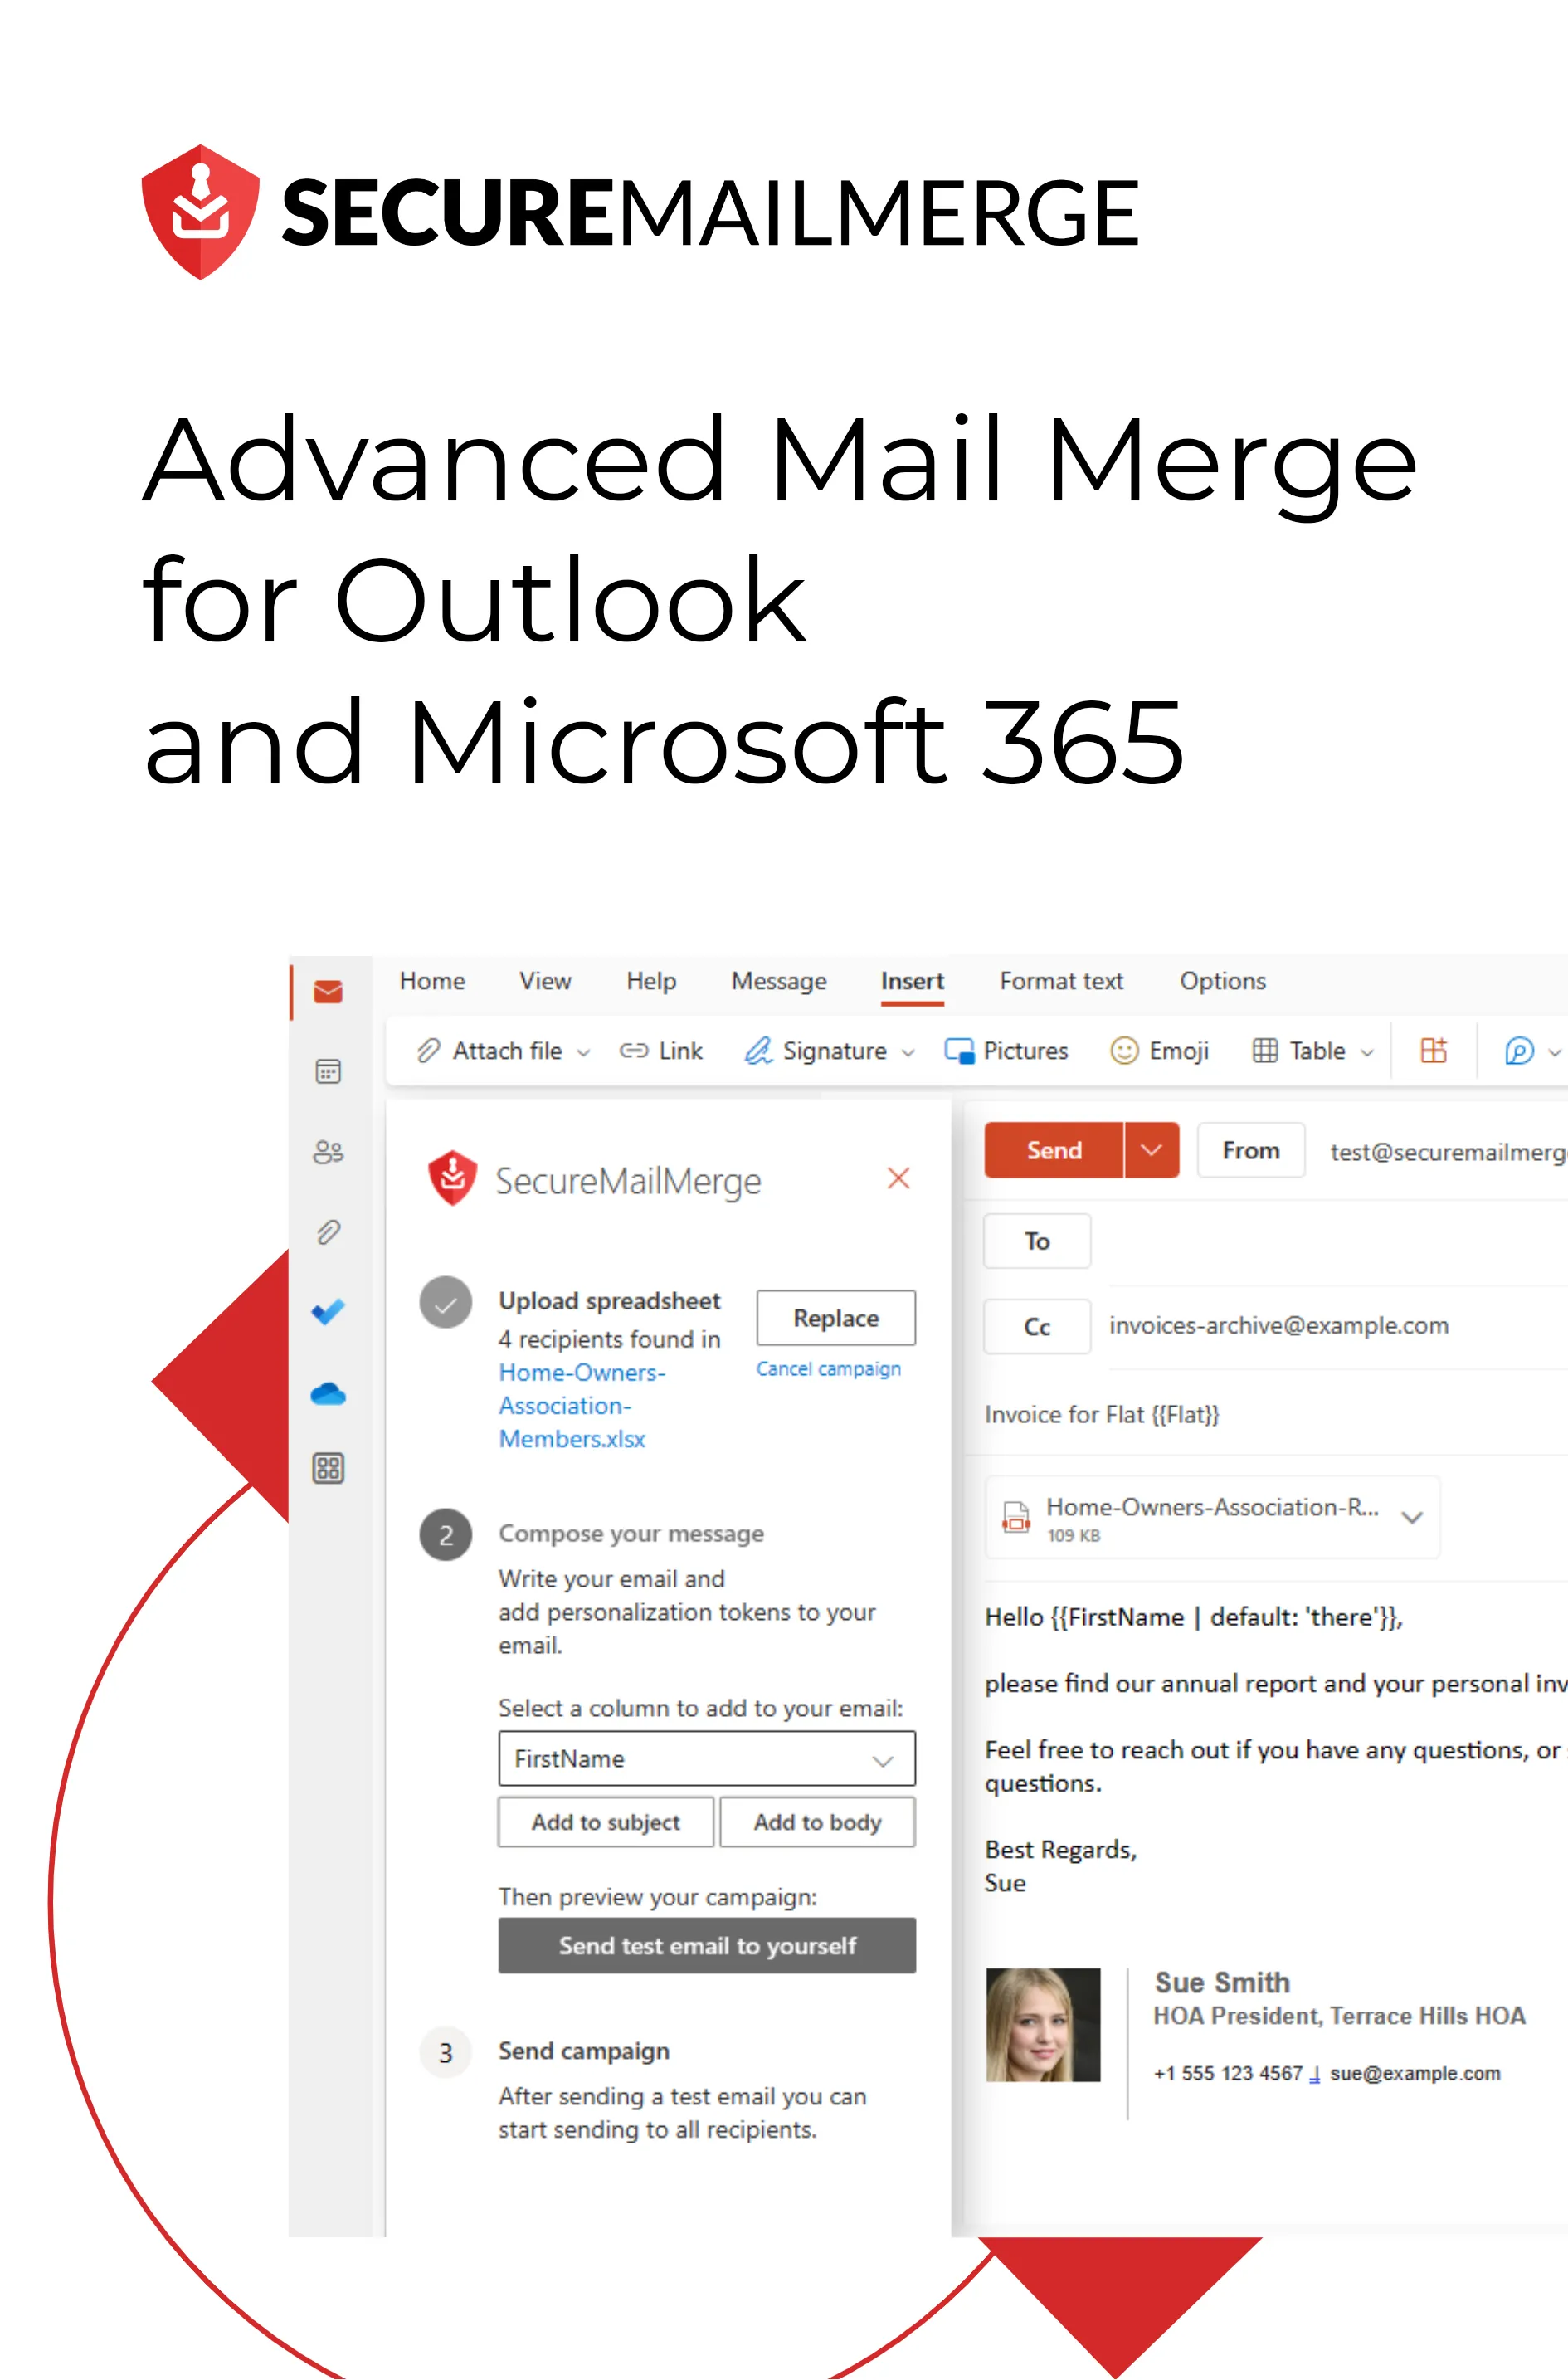
To perform a mail merge, you’ll need to create a spreadsheet with the necessary information first. For our example, let’s look at this simple spreadsheet containing the greeting, first name, last name, and the email addresses we want to send our emails to:
Next, head to Outlook, where you’ll install a free plugin called Secure Mail Merge. To do this, click on Get Add-ins, search for “Secure mail merge,” and click Add to install the plugin to your account. When composing a new email, you’ll now see a new icon called the Secure Mail Merge Campaign Manager.
Creating a Mail Merge Campaign
-
In the Secure Mail Merge Campaign Manager, click on Use a Spreadsheet and select the file you’ve created earlier. You can also use contacts from your address book if you prefer.
-
Once your spreadsheet is loaded, double-check that all the data is correct by inspecting the preview.
-
Now it’s time to write your email. For our example, we’ll use the subject line “Are you interested in our new showroom flats?” You can personalize the body of the email by using the appropriate fields from your spreadsheet.
The Secure Mail Merge plugin also allows you to add images and attachments for a more versatile email campaign.
-
To send the email using an alias, you’ll need to switch the “From” setting. If you don’t see this option, go to Options and enable it using the button. If you’ve already used an alias before, you’ll find it in the drop-down menu. If not, click on Other Email Address and add the email alias you’d like to use.
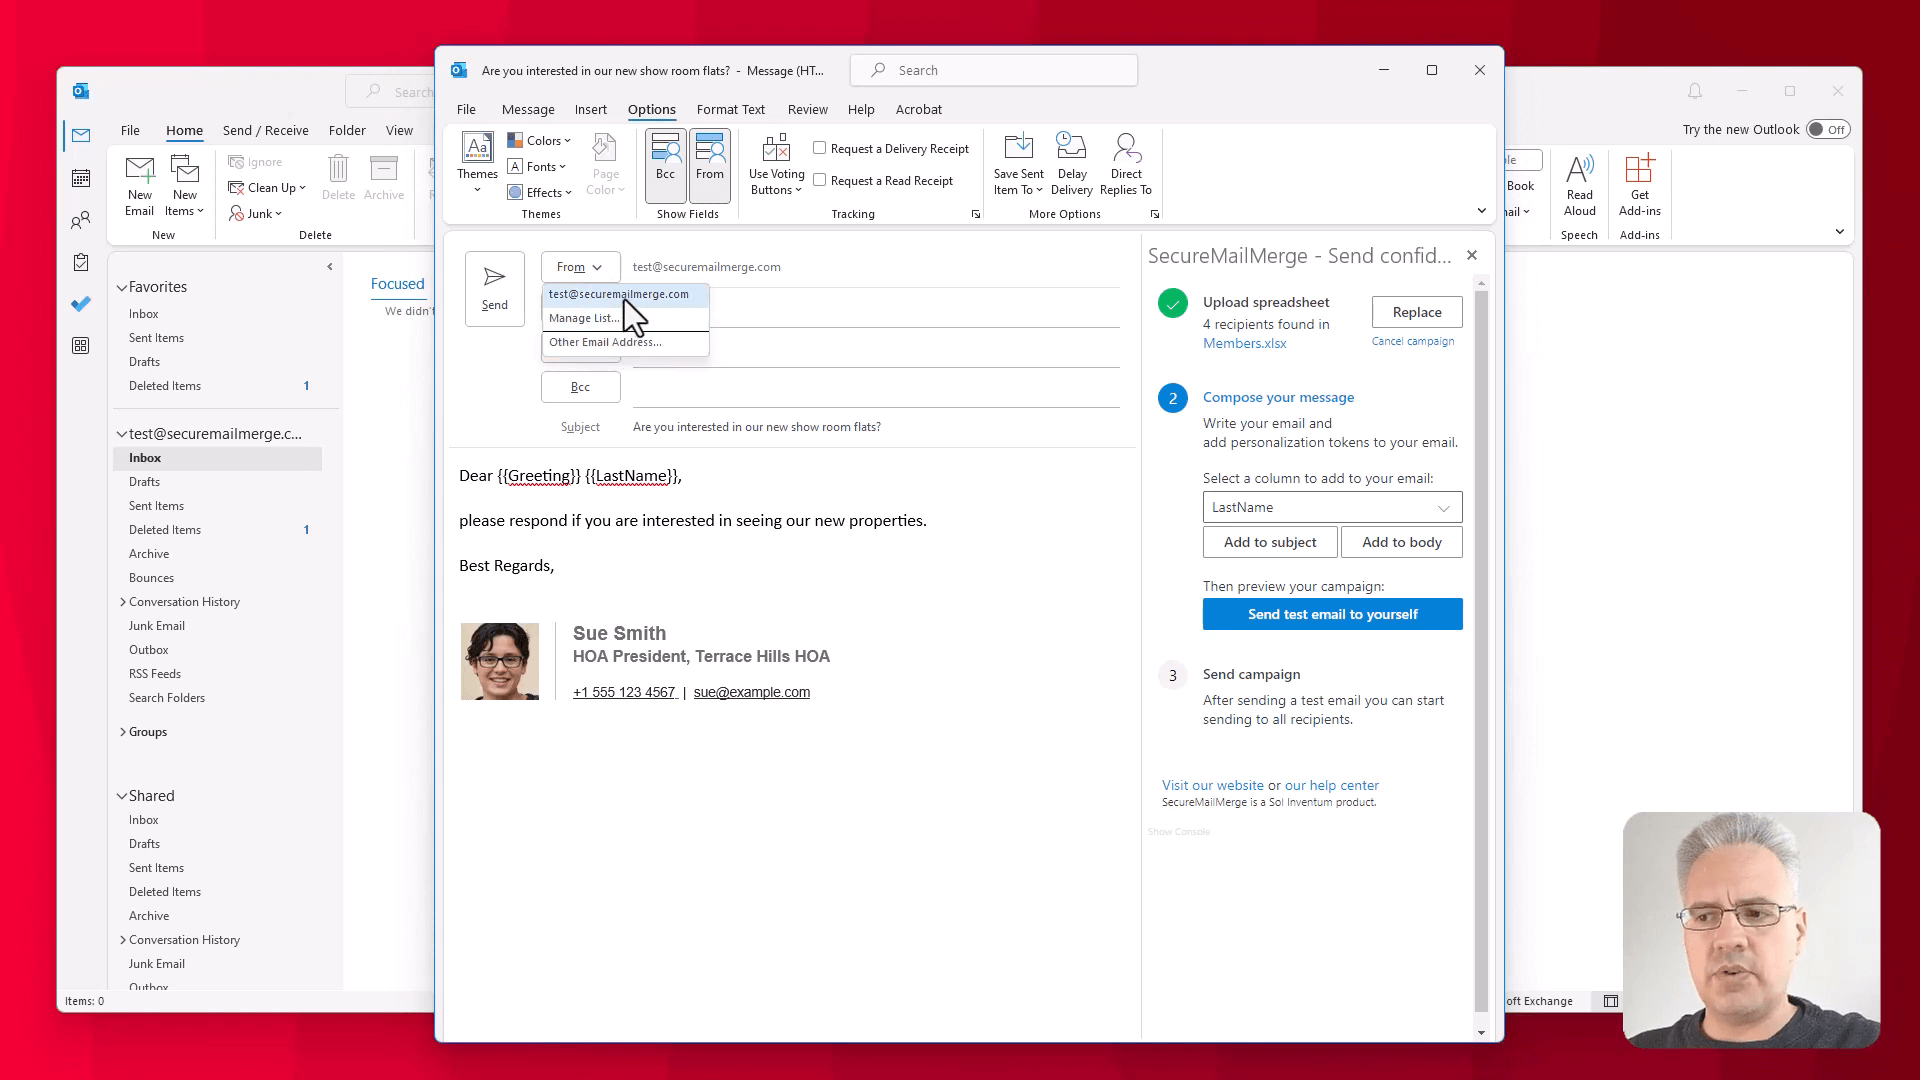 Note: Your IT team needs to configure the alias and grant you the necessary permissions to send emails from it. If you encounter any issues, contact your IT team for assistance.
 -
Before sending the campaign, it’s a good idea to test the email by sending it to yourself. Log into Microsoft 365 to grant the necessary permissions for Secure Mail Merge, and the plugin will send your test email in the background.
-
Check your inbox to see if the test email has arrived. Verify that the mail merge fields have been replaced correctly, and that the email has been sent from your chosen alias.
-
Once you’re satisfied with how the email looks, head back to the Secure Mail Merge Campaign Manager and click on Start sending campaign. The plugin will show you the progress of the campaign, and you can monitor the sent emails in your Outlook account.
And that’s it! You’ve successfully sent a mail merge campaign using an email alias in Microsoft 365. Thanks for reading!
Enjoyed this article?
We have a whole library of useful articles for you to read
Show me the library of Outlook articles