Know how directly from the Microsoft 365 mail merge experts
Send a Mail Merge with Individual Attachments in Outlook 365
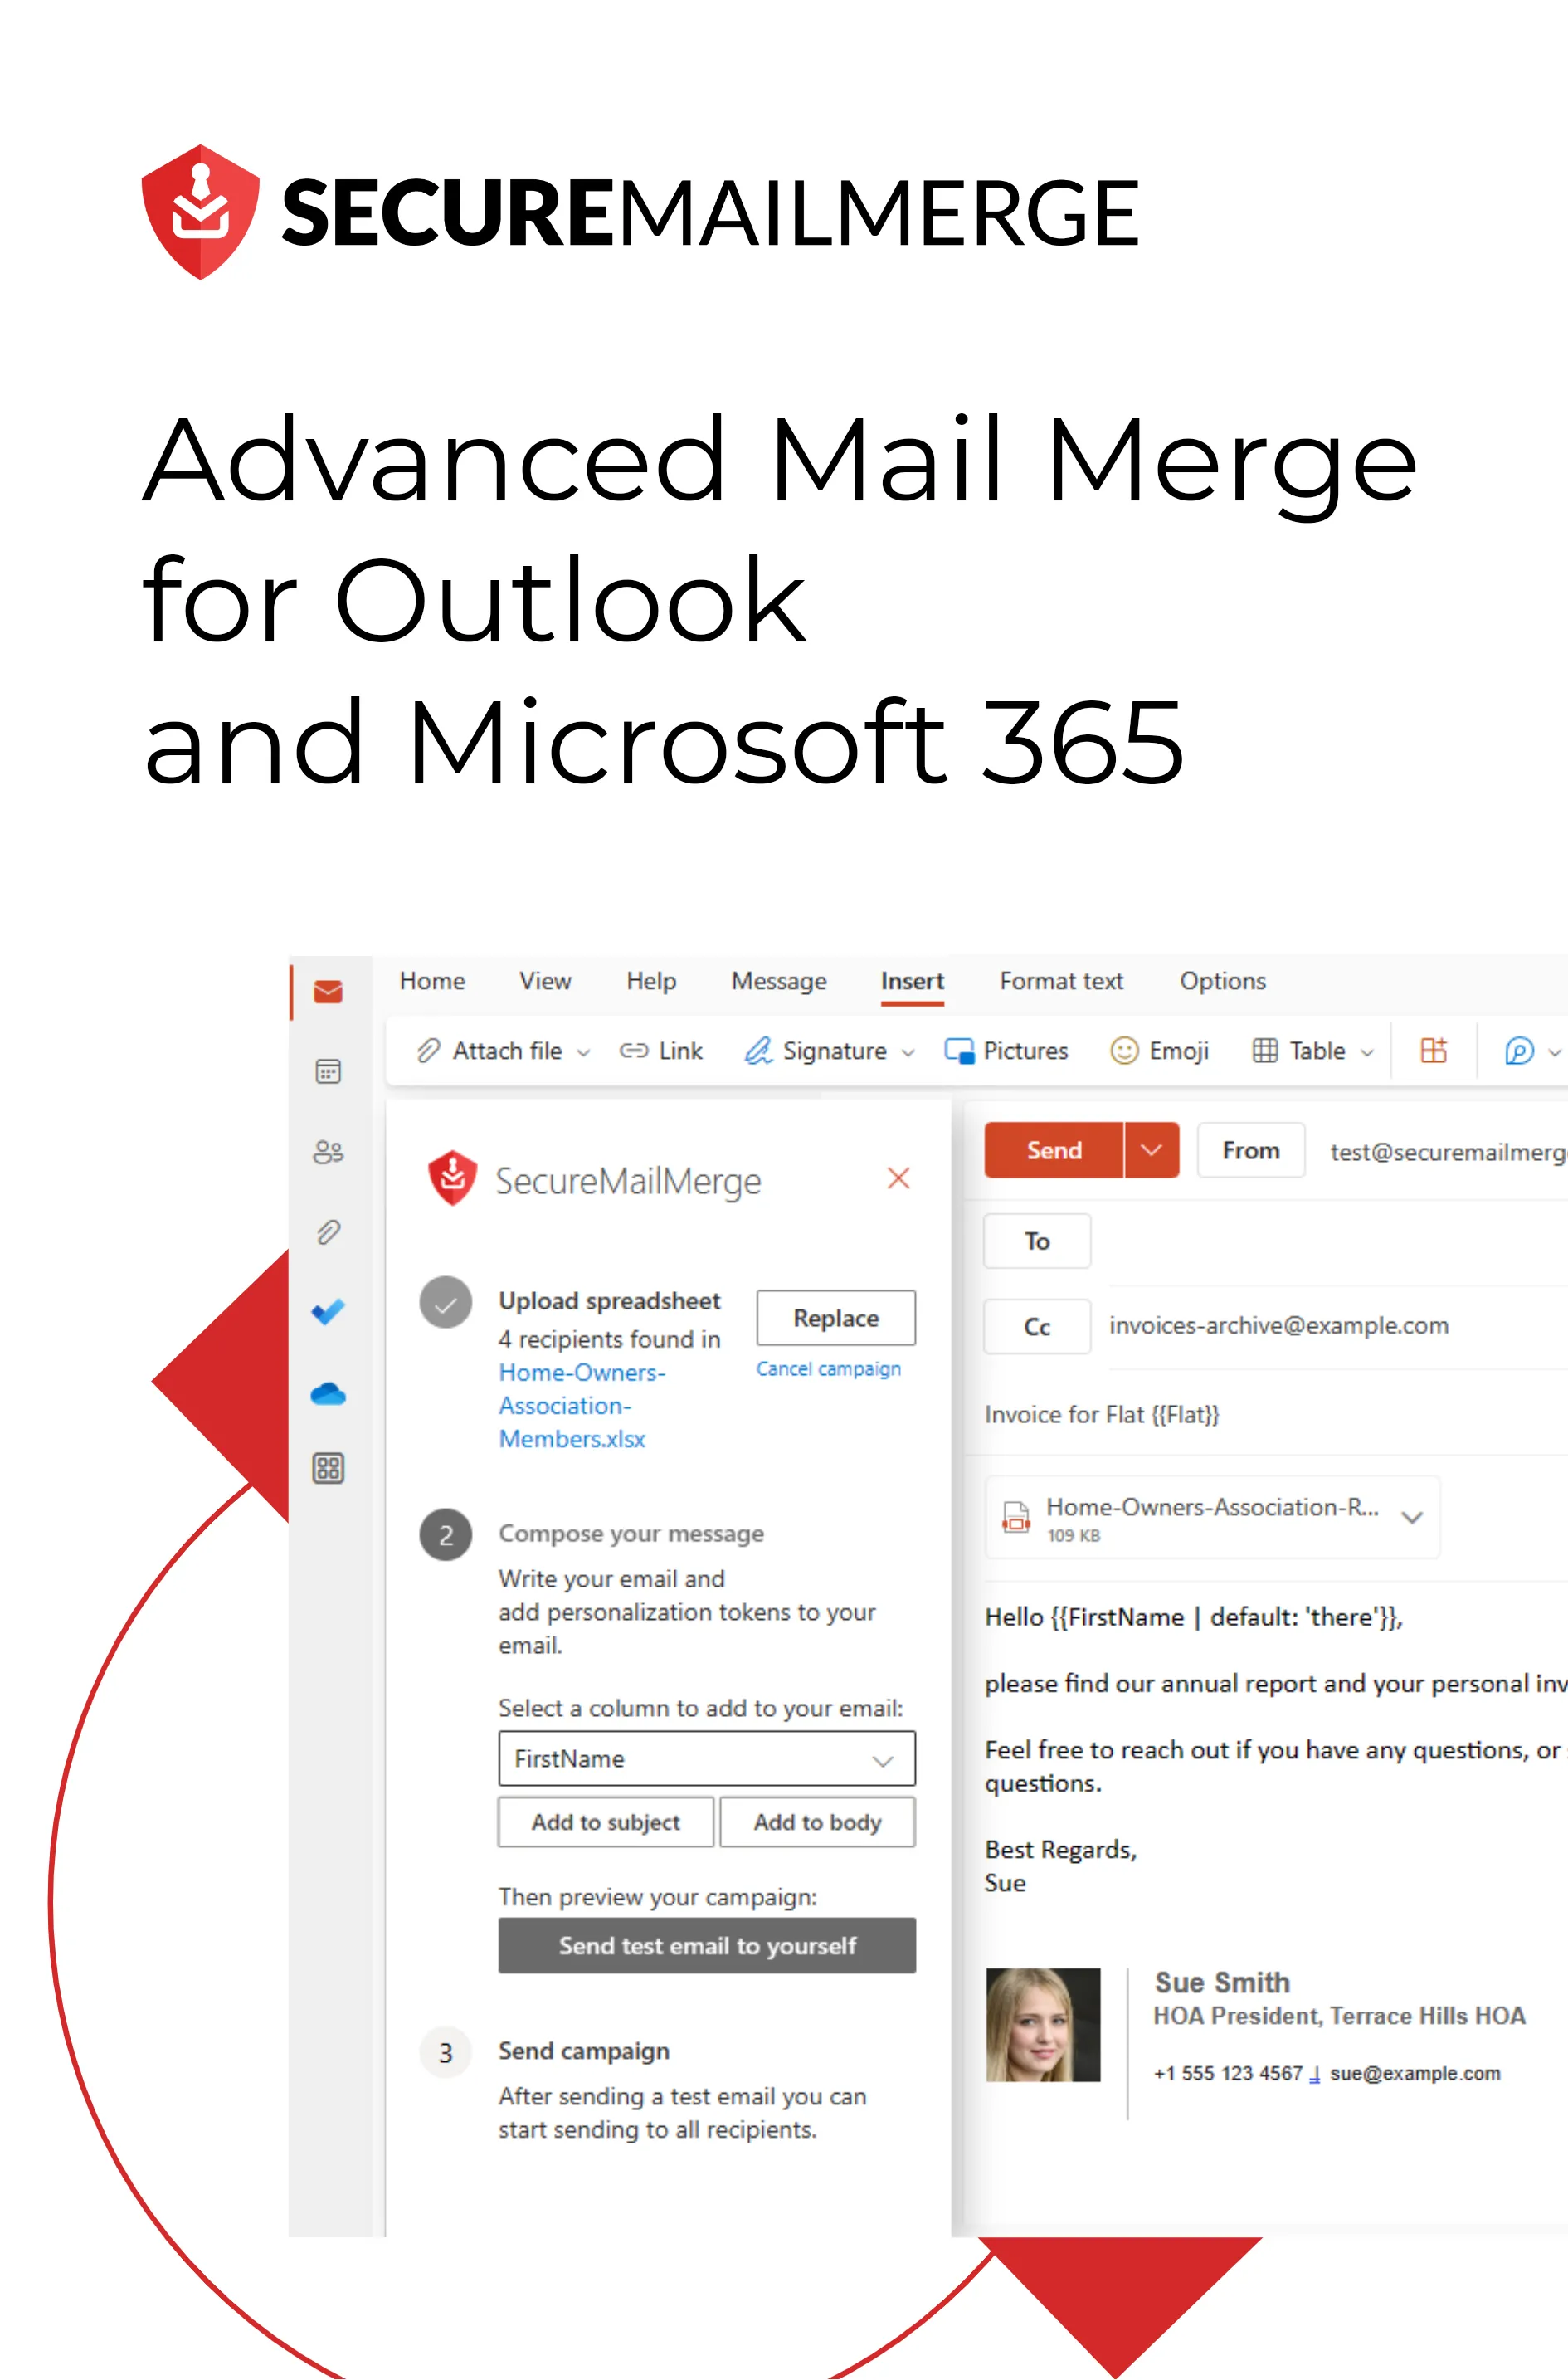
Sending out personalized emails with individual attachments can be a tedious task. But, with Microsoft Outlook 365 and a free plugin called Secure Mail Merge, it can become a breeze. In this blog post, we will walk you through the process step by step. If you prefer you can also watch the video on YouTube.
Preparing Your Data Spreadsheet
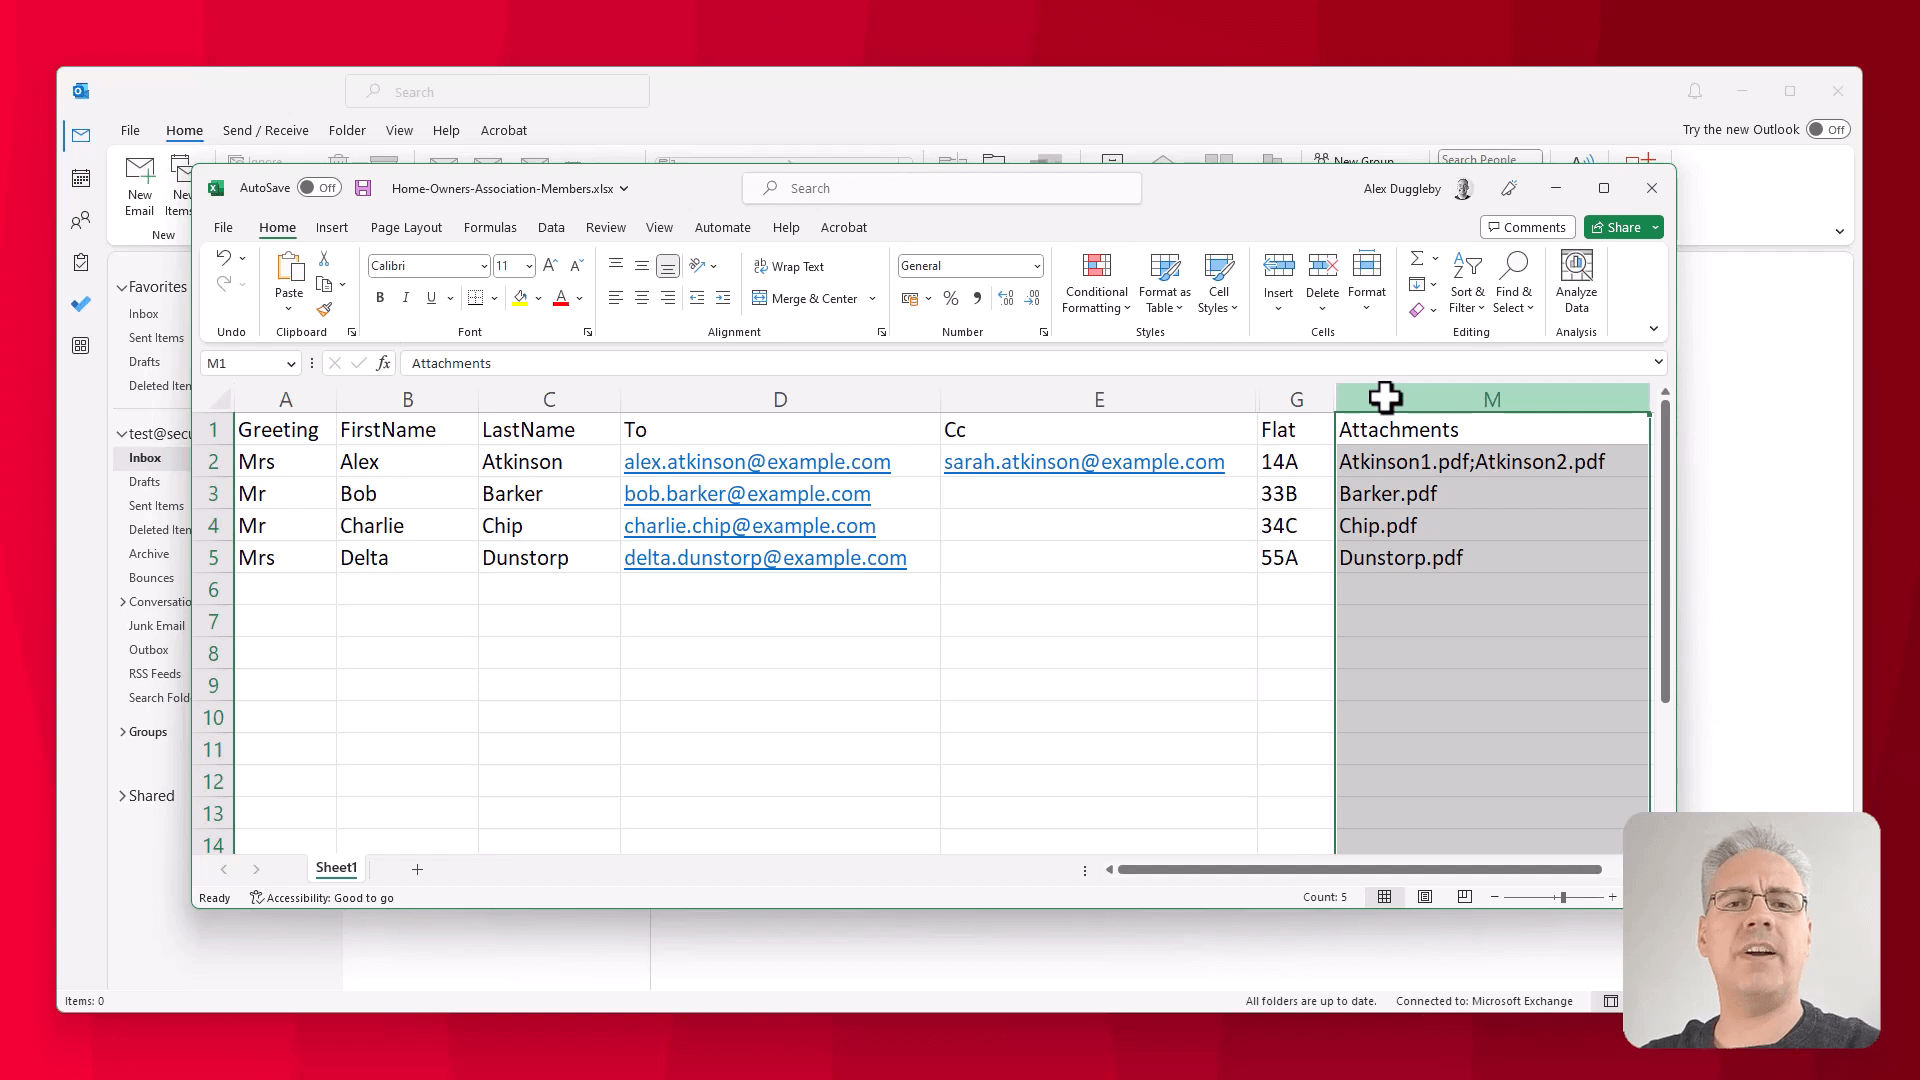
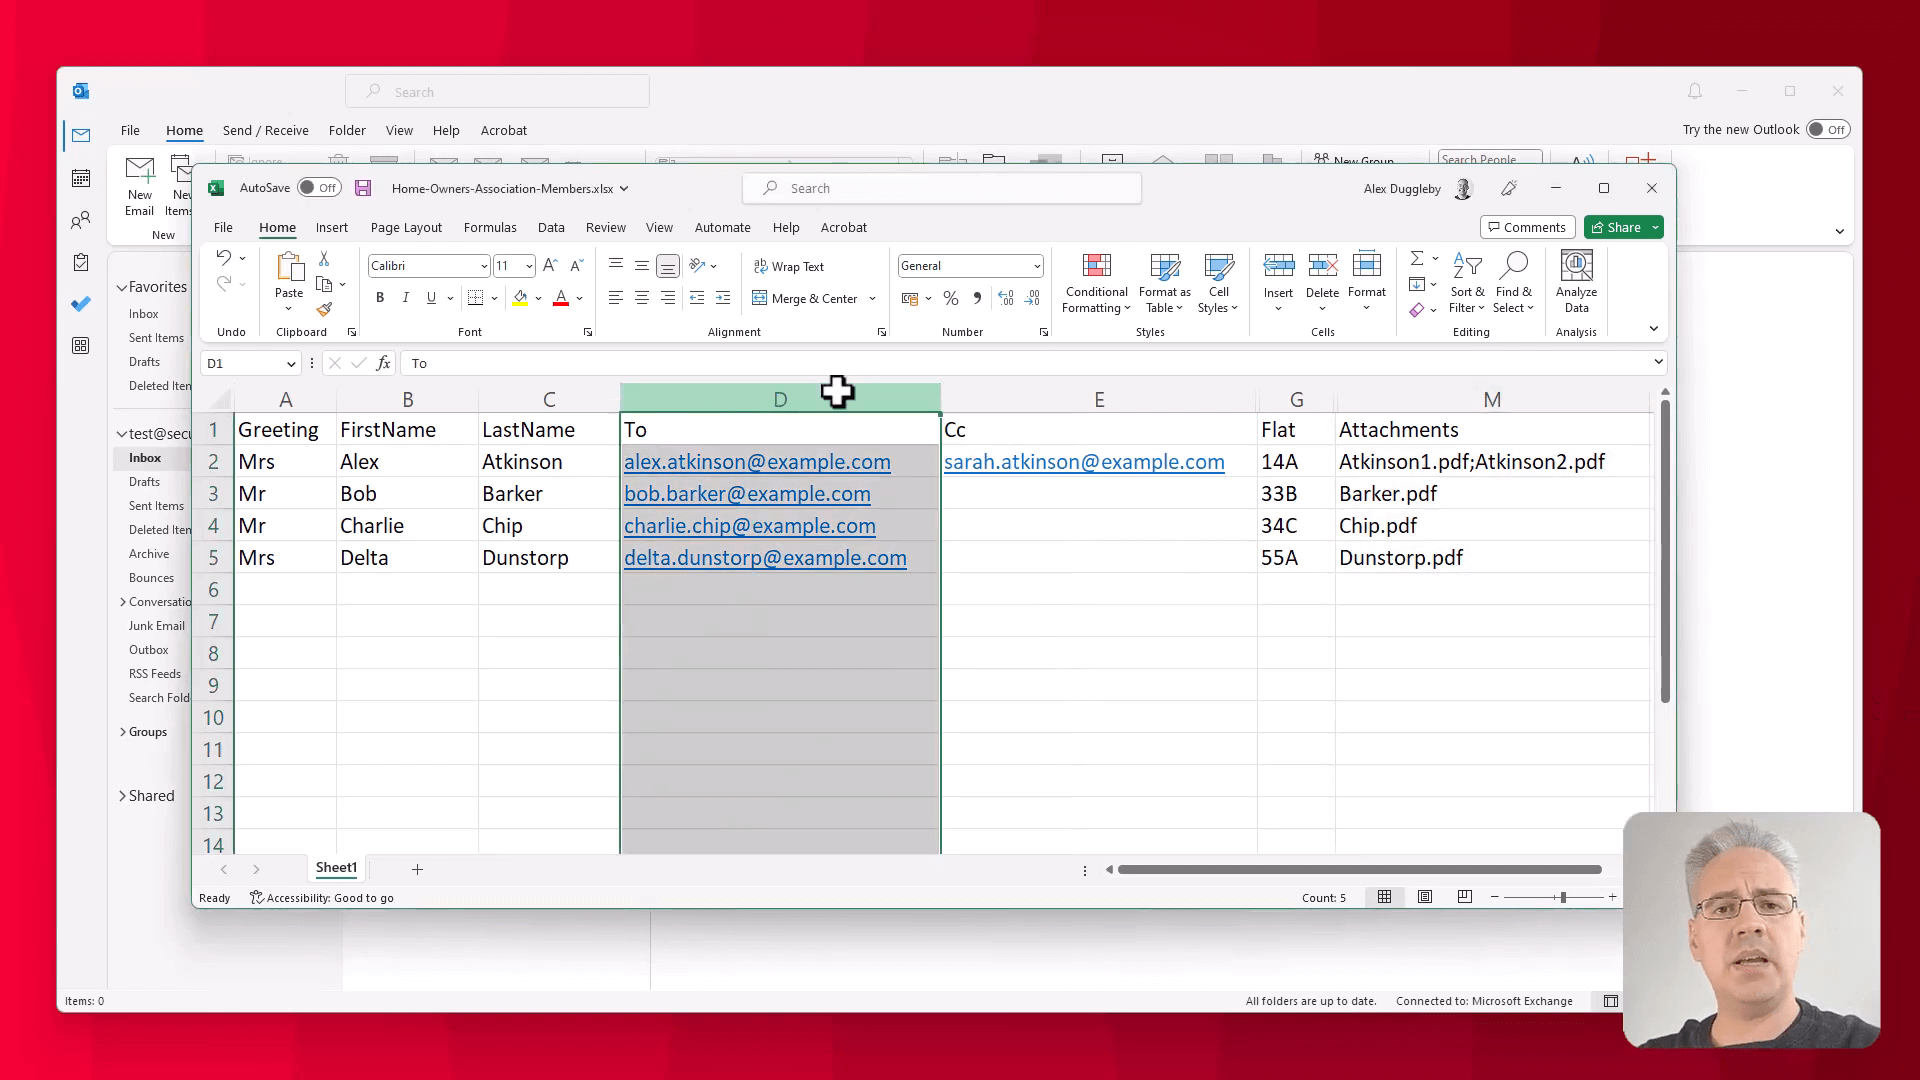 The first step in any mail merge is to create a spreadsheet containing the information that you’d like to send out to your customers. For example, this may include fields like:
- First Name
- Last Name
- Email Address (To column)
- CC Email Address (optional)
- BCC Email Address (optional)
- Any other information you’d like to include, such as a flat number, invoice number, or any other custom fields.
Additionally, you should include a column containing the filenames of the files you want to attach for each recipient. You can add multiple files to a single email by separating them with a semicolon, as shown in the example:
Installing the Secure Mail Merge Plugin
Switch over to Outlook, and follow these steps to install the Secure Mail Merge plugin:
- Click on “Get Add-ins.”
- Search for “Secure Mail Merge.”
- Click the “Add” button.
The plugin is now installed and will appear when you click on “New Email.”
Using the Plugin to Send Your Mail Merge
 With the plugin installed, you can start setting up your mail merge:
- Click on the Secure Mail Merge icon in the “New Email” window.
- Choose whether you’d like to use a spreadsheet or send a mail merge to people in your address book. In this case, we are using a prepared spreadsheet.
- Select the spreadsheet file you prepared earlier.
Next, upload the attachments:
- The plugin will look for the “Attachments” column in your spreadsheet and prompt you to upload the necessary files.
- Click on “Add Files” and navigate to the folder containing the files you want to attach.
- Select all the files using Ctrl+A or by selecting them with the mouse.
- Click on “Open” to add the files to the mail merge campaign.
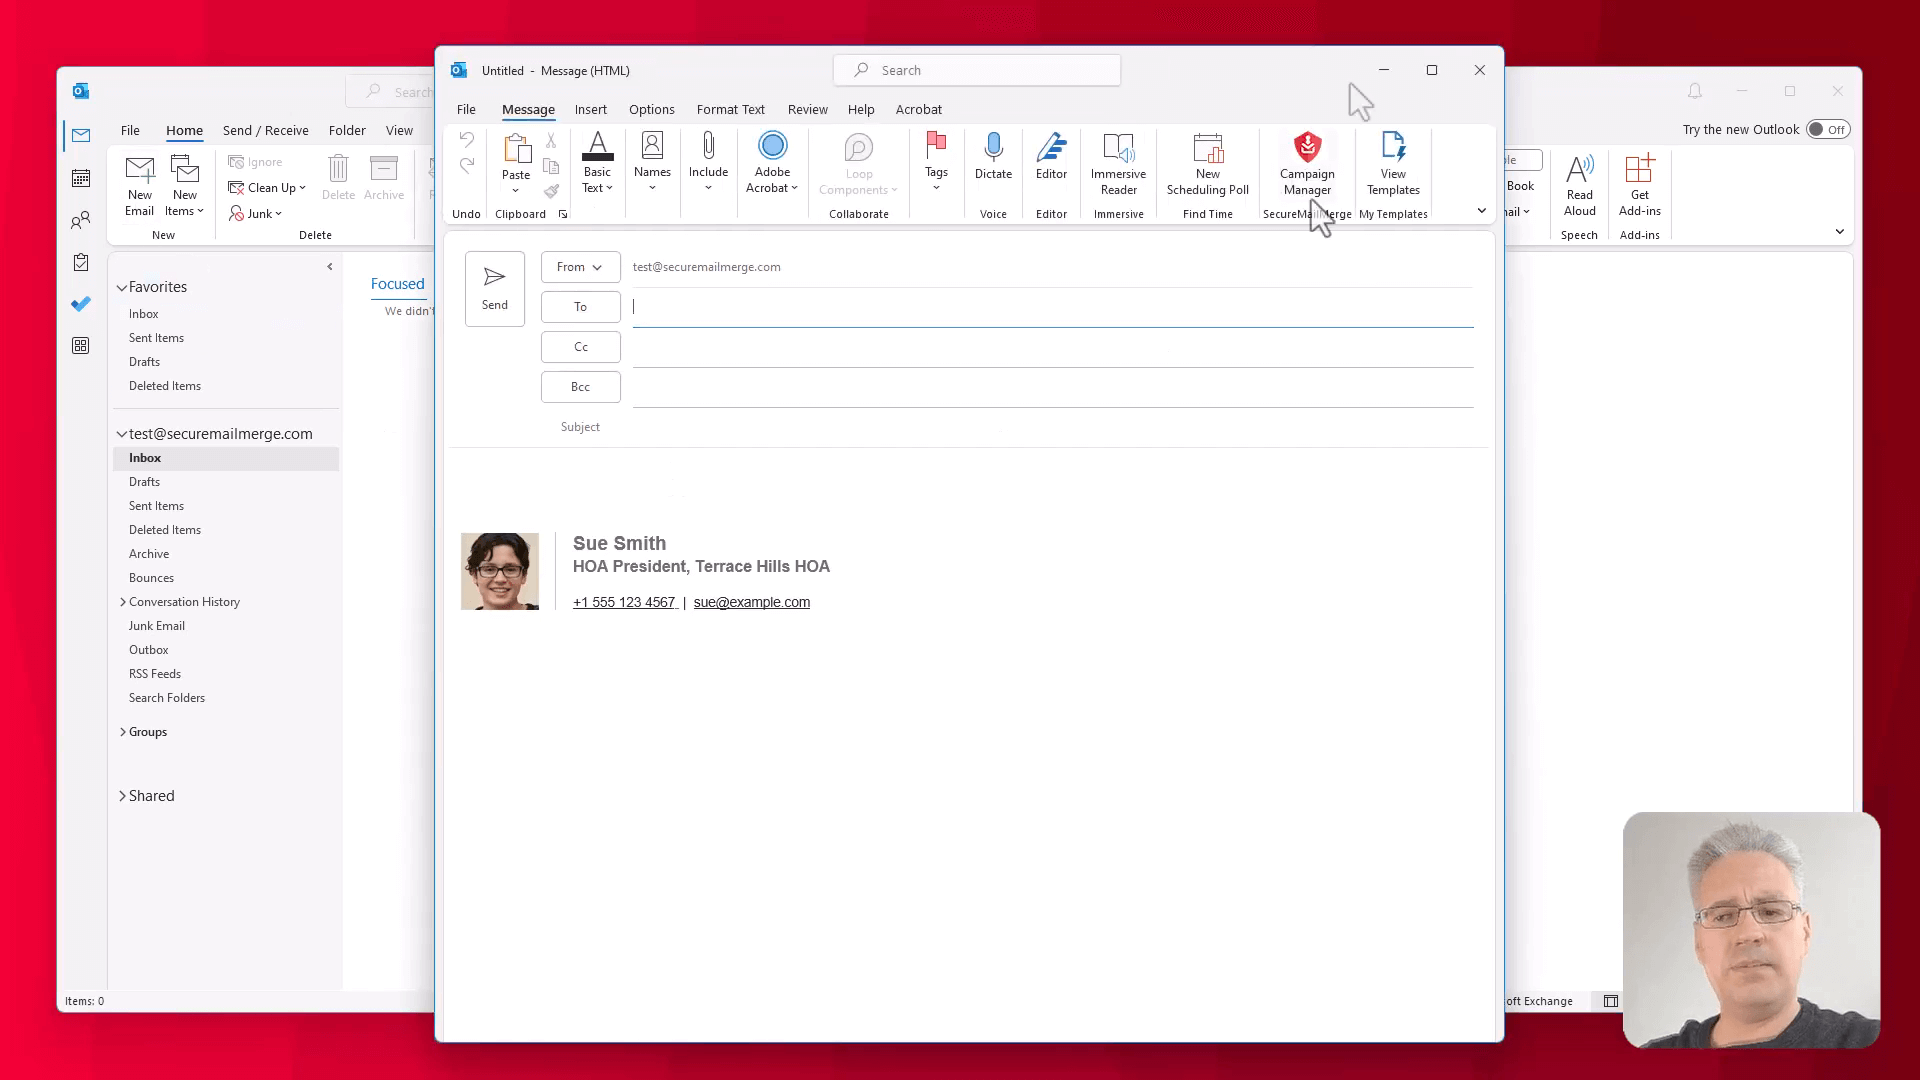
With your data and attachments prepared, it’s time to write your email:
-
Write your email subject and body, making sure to include your custom fields using the dropdown menu provided by the plugin.
- For instance:
Invoice for Flat {{Flat Number}}. - In the email body, you can add fields like “Dear [Greeting] [Last Name]” and any other custom content.
- For instance:
-
You can also format the email as you wish, including adding signatures, images, etc.
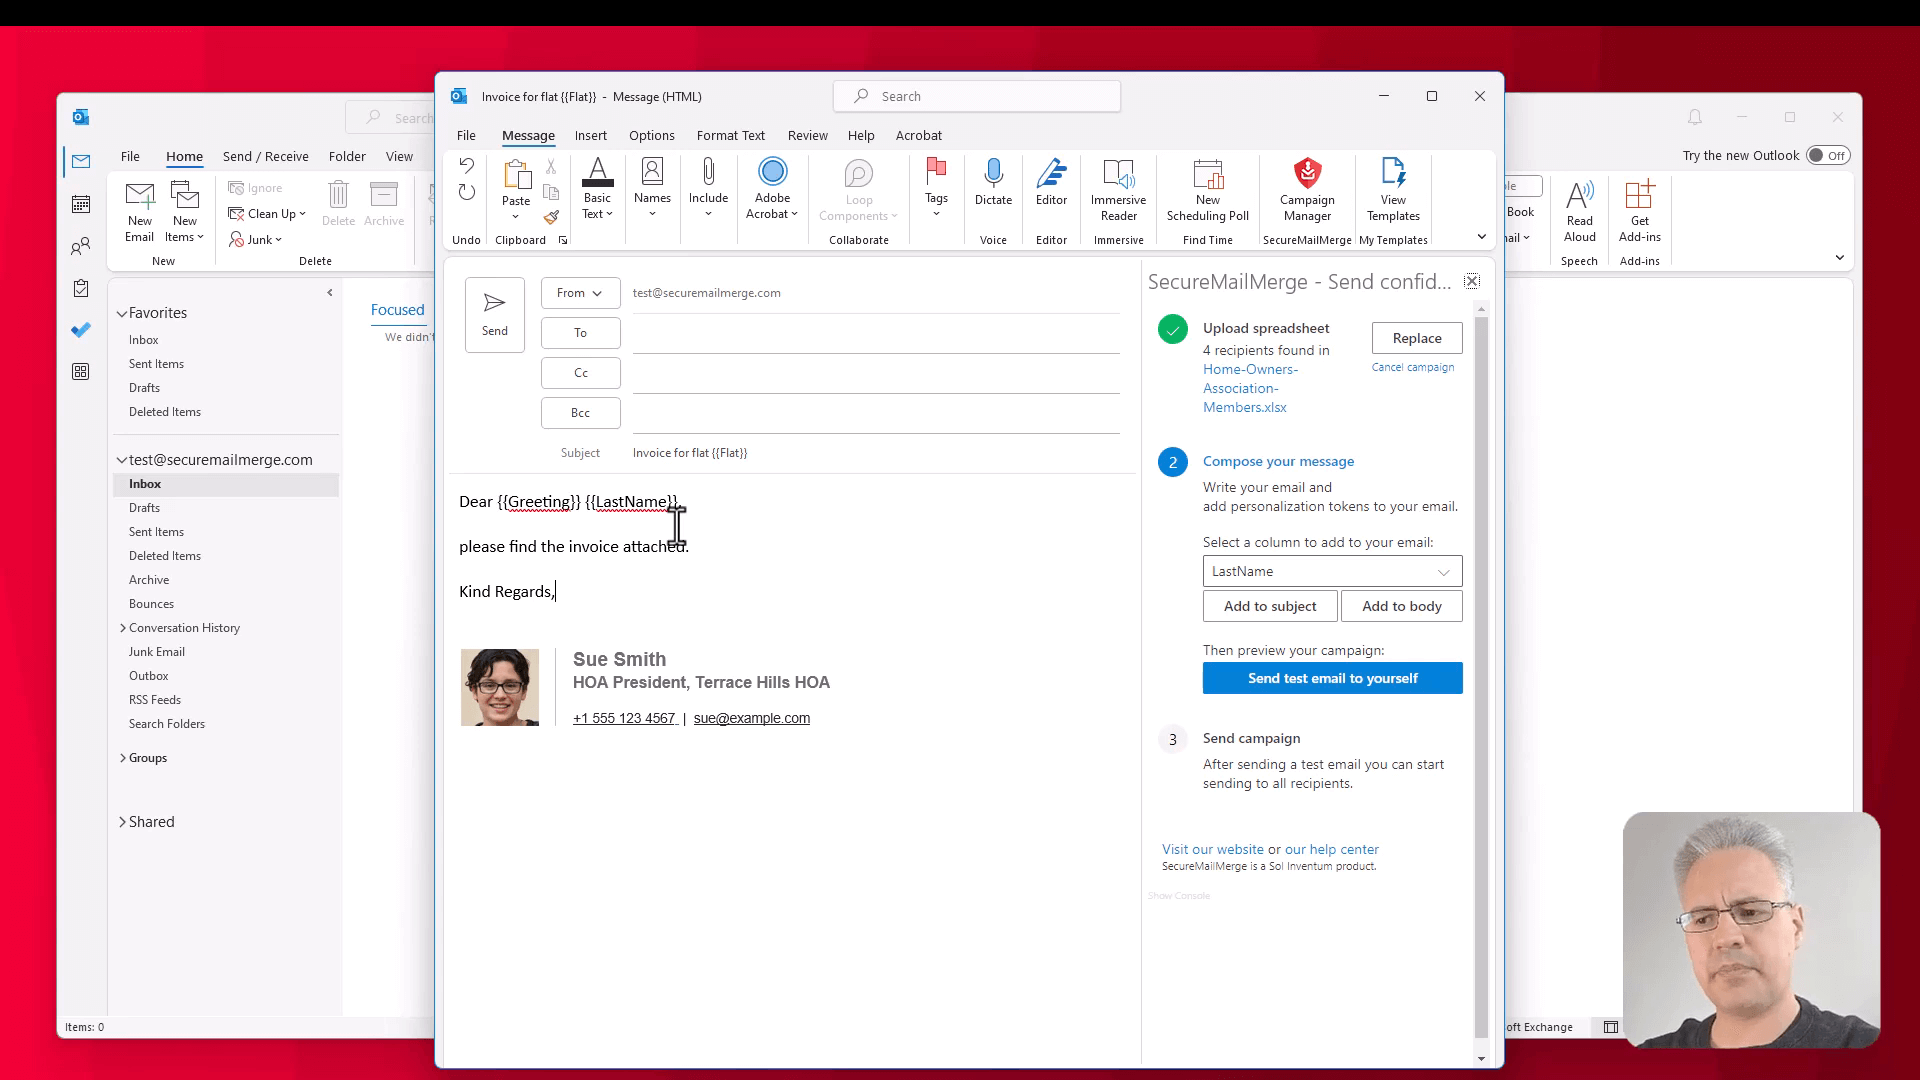 Before sending out the mail merge, it’s always a good idea to test it beforehand:
- Click the “Test Email” button in the plugin to send a test email to yourself.
- Authenticate with your Microsoft 365 account when prompted.
- Check your inbox to verify that the first row of your spreadsheet is used to populate the email, and the attachments are properly included.
Finally, when you’re satisfied with your test email, you can proceed to send the mails:
- Click on “Start Sending Campaign” in the plugin.
- Monitor the progress as the emails are sent and the attachments are added.
- Head over to your “Sent Items” folder in Outlook to see all the emails sent by the plugin.
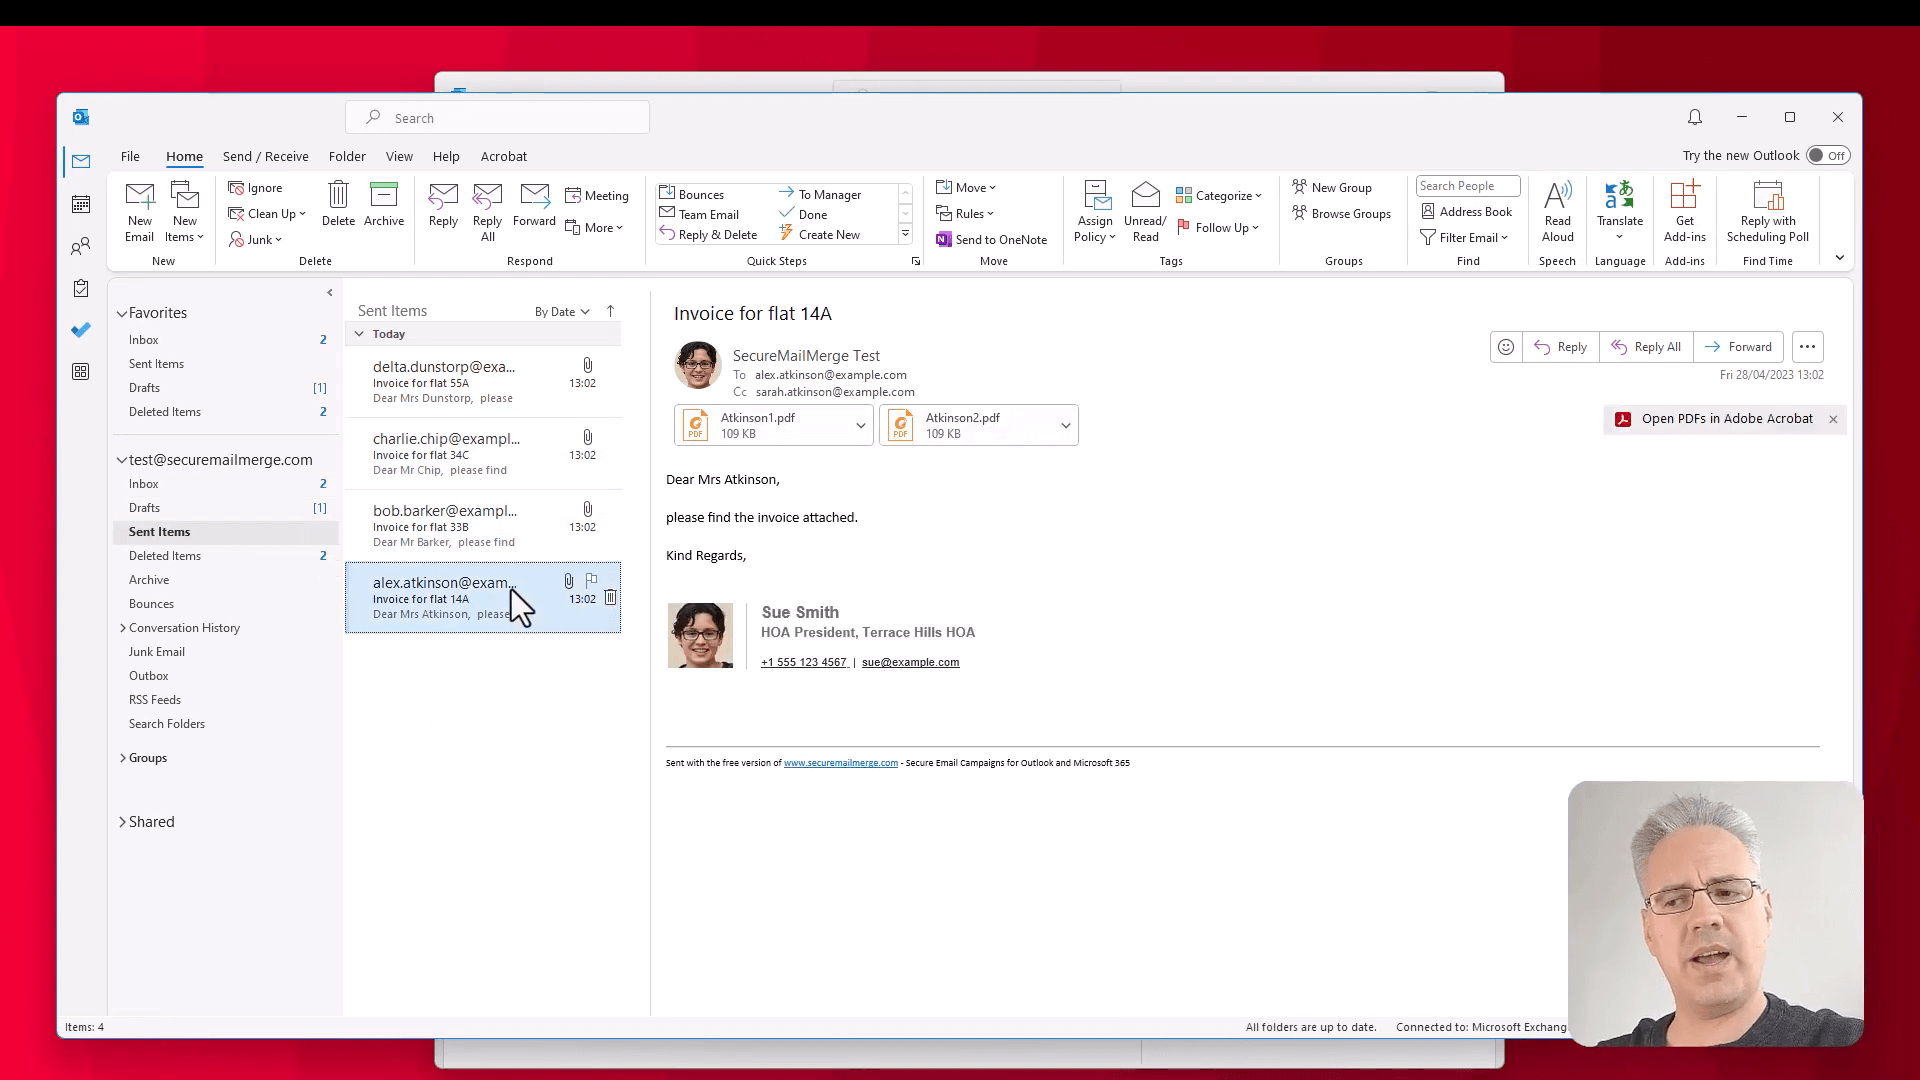 And that’s it! You’ve now successfully sent a mail merge with individual attachments using Microsoft Outlook 365 and the Secure Mail Merge plugin.
Enjoyed this article?
We have a whole library of useful articles for you to read
Show me the library of Outlook articles