Using the Outlook address book to send mail merge campaigns
If you would like to send a personalized email campaign to a group of contacts from your address book (or from a shared address book) you can do so using the free or paid version of SecureMailMerge. This guide will show you the steps.
Contents
Step 1. Switch to address book mode
If you haven’t installed the SecureMailMerge plugin yet, head to the Microsoft store and do that first. There’s a free version available and works with your existing Microsoft 365 Business subscription.
Next click on “New Email” and then find the SecureMailMerge icon on the menu bar.
If you’re having trouble finding it, see our Step 2 of our general guide that has detailled instructions for each platform and then return to this page.
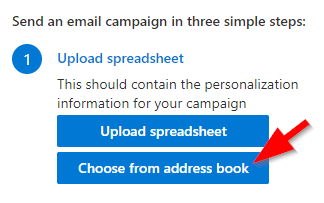
Once the plugin starts, click the button “Choose from address book”.
Step 2. Loading your address book contacts
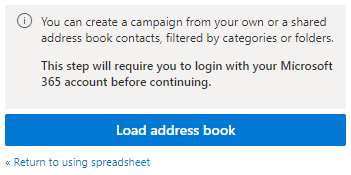
This will switch you into address book mode and let you load your contacts from your adress book. Click on the button “Load address book”.
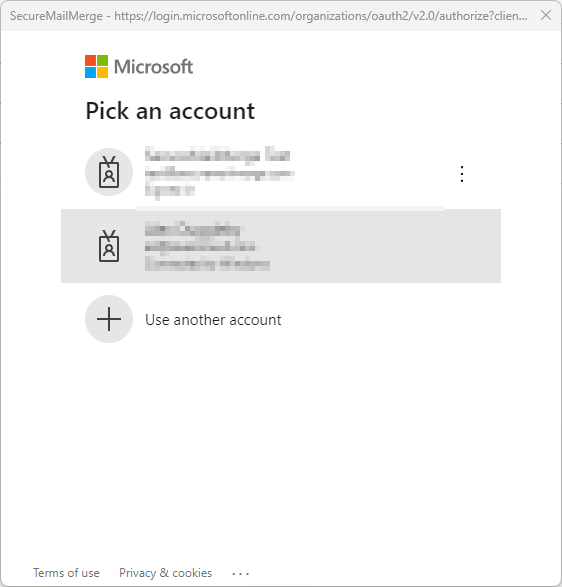
This will open a new window and ask you to authenticate with your Microsoft account. This is necessary because the plugin needs to read the information from Microsoft. None of this data is sent anywhere, it’s just displayed for you in the plugin.
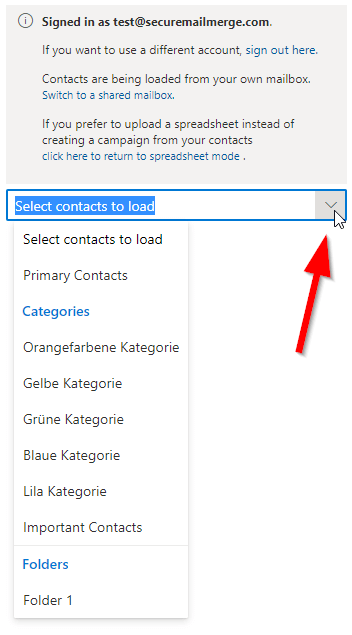
Once you’ve authenticated, the window closes and you will see a drop-down asking you to select which contacts to load.
You will find the option “Primary Contacts” which will simply load your default address book contacts. But if you are using categories or contact folders, you will see them too and can select them to load only contacts matching those criteria.
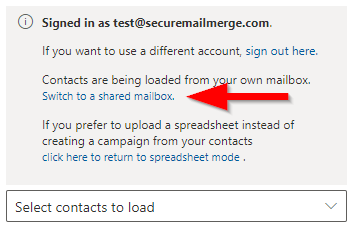
Note: If you would like to load an address book from another mailbox that you have access to, e.g. a shared mailbox, click the link “Load contacts from another mailbox” and enter the email address of the mailbox you want to load contacts from. Categories are not available from shared mailboxes, but otherwise everything below applies to sharead contacts too.
Step 3. Adding contacts to your campaign
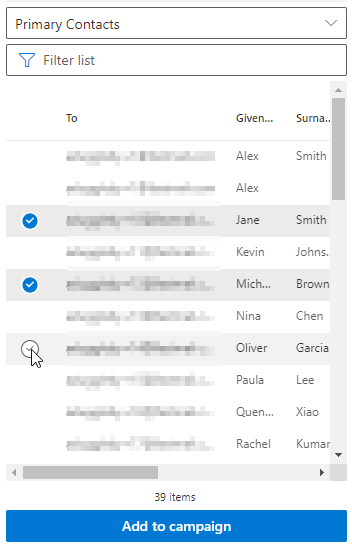
In the list of contacts you can select one, multiple or all contacts using the round checkboxes on the left. Click “Add to Campaign” if you want to include them in your campaign. You can filter contacts to find the right ones, switch between categories and folders as you like, the contacts you have previously added will be retained.
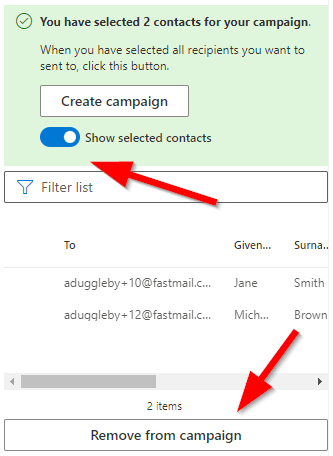
If you want to see who you have already added, toggle the switch at the bottom. You can remove contacts from the lists again by first selecting them and then clicking the “Remove from Campaign” button.
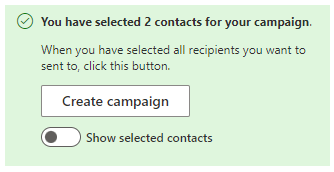
When you are ready to send, click the “Create Campaign” button and you will be taken back to campaign editing mode with your selected contacts loaded into the plugin.
Step 4. Compose and send your campaign
Next, you can continue with creating your email template using information you loaded from your address book.